kenmore gas range owners manual

Kenmore Gas Range Owners Manual: A Comprehensive Guide

Welcome! This manual provides essential guidance for operating and maintaining your Kenmore gas range, model 74343, a convection gas model priced around $1,400.

Congratulations on selecting a Kenmore gas range! This appliance is designed for reliable performance and convenient cooking. This manual – specifically for model 74343 – serves as a comprehensive resource, guiding you through safe operation, essential maintenance, and troubleshooting.

Kenmore ranges are known for their quality and features, and the 74343 is no exception, offering convection baking alongside standard gas cooking capabilities. Understanding your range’s features, as detailed within this guide, will maximize your cooking experience.

Before first use, please carefully review the safety precautions outlined in this manual to ensure a secure and enjoyable cooking environment. Access to manuals, including this one, can sometimes be found through resources like Manualzilla and the Internet Archive.

Understanding Model Numbers (e.g., 74343)

Your Kenmore gas range’s model number, such as 74343, is crucial for identifying specific features, ordering replacement parts, and accessing the correct documentation. This five-digit number provides key information about your appliance’s configuration and manufacturing details.

The model number is typically located on a label affixed to the range’s frame. It’s often found behind the oven door, on the side of the cooktop, or on the back panel. Referencing this number when contacting Kenmore customer support or searching for online resources – like those available through Manualzilla – ensures you receive accurate assistance.

Knowing your model number allows you to pinpoint specific instructions and troubleshooting steps relevant to your Kenmore gas range, maximizing the usefulness of this owner’s manual and other support materials.

Safety Precautions

Important Safety Information: Your Kenmore gas range utilizes flammable gas and generates high temperatures. Prioritize safety during operation; Ensure adequate ventilation to prevent carbon monoxide buildup – a potentially fatal hazard. Never use the range for heating a room.

Keep flammable materials, such as paper, plastics, and aerosol cans, away from burners and the oven. Supervise children closely when the range is in use. The exterior surfaces become hot during operation and retain heat for a period afterward.

Regularly inspect the gas supply connections for leaks. If you smell gas, immediately evacuate the area, and contact your gas company or emergency services. Do not attempt to operate the range if a gas leak is suspected.

Carbon Monoxide Warnings

Critical Safety Alert: Gas ranges produce carbon monoxide (CO), an odorless, colorless, and potentially deadly gas. Proper ventilation is essential to prevent CO buildup. Never block or obstruct the range’s ventilation openings.

Install a carbon monoxide detector near the kitchen, following the manufacturer’s instructions for placement and maintenance. Regularly test the detector’s functionality. Symptoms of CO poisoning include headache, dizziness, nausea, and confusion.

If the CO detector alarms, immediately evacuate everyone from the home and call emergency services. Do not re-enter until the source of the CO has been identified and corrected by a qualified professional. Ignoring CO warnings can be fatal.

Flammable Materials & Ventilation

Important Safety Instructions: Keep flammable materials – such as paper, plastic, curtains, and aerosol sprays – well away from the Kenmore gas range. These items can ignite if exposed to open flames or excessive heat. Always maintain a clear and safe cooking area.

Ensure adequate ventilation while using the range. Operate the range with a functioning range hood that vents to the outside. This helps remove combustion byproducts and prevents grease buildup. Never use the oven for storage, as it can become dangerously hot.

Avoid wearing loose-fitting clothing while cooking. If clothing catches fire, STOP, DROP, and ROLL to extinguish the flames. Regularly inspect the gas supply line for leaks or damage.

Child Safety Considerations

Protecting Children is Paramount: Never leave children unattended near the Kenmore gas range. The cooktop and oven surfaces become extremely hot during and after use, posing a severe burn risk. Implement preventative measures to ensure their safety.

Utilize the rear burners whenever possible when cooking with children present. This minimizes their reach to hot surfaces. Teach children about the dangers of touching the range and oven controls. Consider installing oven door locks to prevent accidental opening.

Keep pot handles turned inward to avoid accidental bumping or grabbing. Regularly check the cooktop for spills or debris that could attract children. Supervise children closely in the kitchen at all times.

Operating Your Kenmore Gas Range

Let’s get cooking! This section details the ignition system, surface burner usage, and oven operation for your Kenmore gas range, model 74343.

Ignition System – How it Works

Understanding the Spark: Your Kenmore gas range utilizes an electronic ignition system, eliminating the need for standing pilot lights. When you turn a surface burner control knob, it initiates a spark at the burner port. This spark ignites the gas flowing from the burner, creating a flame.

Key Components: The system relies on a spark module, igniter, and gas valve. The spark module generates the high-voltage spark, while the igniter delivers it to the burner. The gas valve controls the gas flow. If the flame doesn’t ignite within a few seconds, the system automatically shuts off the gas supply for safety.

Troubleshooting Tip: If a burner fails to light, ensure the power cord is securely plugged in. A clicking sound indicates the igniter is working; however, no flame suggests a gas supply issue or a faulty burner.

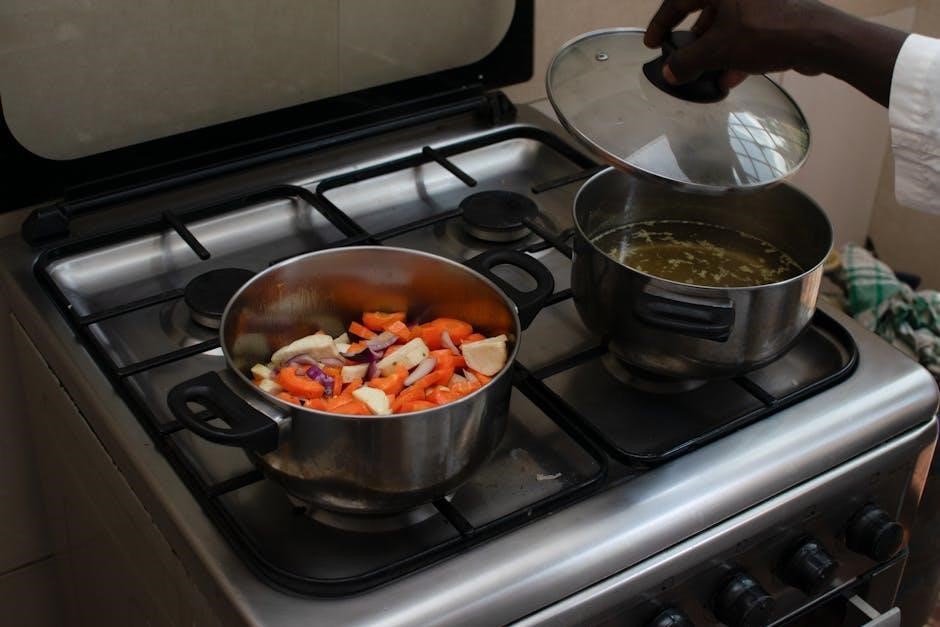
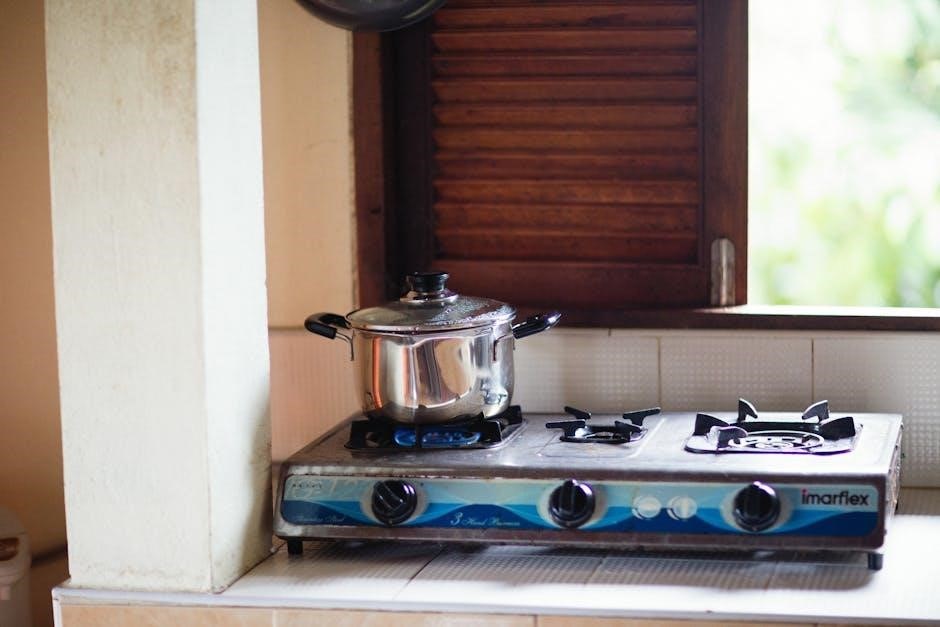
Using the Surface Burners

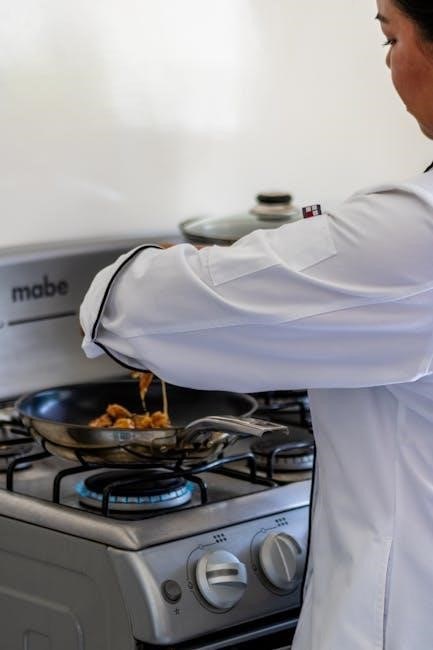
Operating Your Burners: To activate a surface burner, simply press and turn the control knob to the desired flame setting. The range offers a range of flame sizes, from low simmer to high heat. Always start with a lower setting and adjust as needed for optimal cooking results.

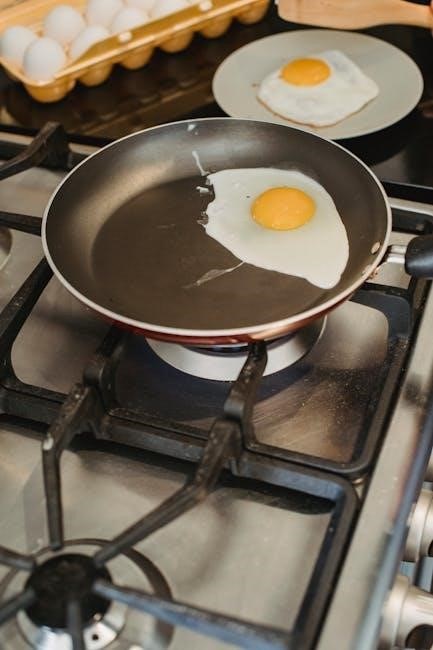
Flame Characteristics: A proper flame should be blue with a slight yellow tip. A completely yellow flame indicates incomplete combustion and may require burner cleaning. Ensure burners are properly seated and aligned for even flame distribution.

Important Reminder: Never leave a burner unattended while in use. Always turn burners off completely when finished cooking. Regular cleaning will maintain optimal burner performance and safety.

Adjusting Flame Size

Precise Control: Your Kenmore gas range allows for precise flame adjustment using the control knobs located beneath each burner. Turning the knob clockwise increases the flame size, while turning it counterclockwise decreases it. Experiment to find the ideal flame for different cooking tasks.

Simmering & Boiling: For delicate simmering, use the lowest flame setting. For rapid boiling, utilize the highest setting. Observe the food closely and adjust the flame accordingly to prevent burning or undercooking. Consistent heat control is key.

Visual Cue: A blue flame with a slight yellow tip is optimal. If the flame is predominantly yellow, it may indicate a need for burner cleaning to ensure efficient combustion and proper heat distribution.

Burner Cleaning & Maintenance

Regular Cleaning: Maintaining clean burners is crucial for optimal performance. Food spills and debris can obstruct gas flow, leading to uneven heating or difficulty igniting. After each use, allow the burners to cool completely before cleaning.

Cleaning Process: Remove the burner caps and heads. Wash them with warm, soapy water, and a non-abrasive sponge. For stubborn residue, soak them briefly. Ensure the gas ports are clear of obstructions using a thin wire or needle.

Dry Thoroughly: Completely dry all components before reassembling. A yellow flame indicates incomplete combustion, often due to dirty burners, requiring immediate attention and cleaning.

Oven Operation

Getting Started: Your Kenmore gas range oven offers versatile cooking options. Before first use, it’s recommended to run a high-temperature cycle to burn off manufacturing residues. Always ensure the oven is empty during this initial burn-in.

Temperature Control: Precise temperature control is key to successful baking and roasting. The oven control panel allows for accurate temperature setting. Refer to recipes for recommended temperatures, and allow the oven to preheat fully before adding food.

Cooking Modes: Explore the various baking and broiling modes available on your model. Convection baking, when utilized, ensures even heat distribution for consistent results.

Setting Oven Temperature

Digital Precision: Your Kenmore gas range utilizes a digital control panel for precise oven temperature settings. To set the desired temperature, use the up and down arrow buttons on the control panel. The display will show the set temperature.

Preheating is Crucial: Always allow the oven to preheat completely before placing food inside. The preheat indicator light will illuminate and turn off when the set temperature is reached. This ensures consistent cooking results.

Temperature Range: The oven typically operates within a temperature range of 170°F to 550°F. Refer to your recipe for the appropriate temperature setting.

Baking & Broiling Modes

Baking Mode: For standard baking, select the “Bake” mode on the control panel. Heat radiates from the bottom element, ideal for cakes, cookies, and casseroles. Ensure the oven rack is positioned in the center for even cooking.

Broiling Mode: To broil, choose the “Broil” setting. The top heating element provides intense, direct heat, perfect for searing meats or browning dishes. Position the oven rack closer to the broiler for faster cooking, but monitor closely to prevent burning.

Convection Option: This Kenmore model features convection baking, enhancing heat circulation for faster, more uniform results. Select the “Convection Bake” option when appropriate.

Convection Baking Explained

Enhanced Heat Circulation: Convection baking utilizes a fan to circulate hot air throughout the oven cavity, resulting in more even temperatures and faster cooking times. This is a key feature of the Kenmore 74343 model.

Temperature Adjustment: When using convection bake, it’s generally recommended to reduce the baking temperature by 25°F compared to traditional baking. This prevents over-browning and ensures food is cooked thoroughly.

Ideal for Multiple Racks: Convection is particularly beneficial when baking multiple trays of cookies or other items simultaneously, as it ensures consistent results on each rack.

Features & Settings

Explore advanced functionalities! Your Kenmore gas range boasts a digital clock, timer, intuitive oven control panel, and a convenient self-cleaning cycle for ease of use.

Digital Clock & Timer

Setting the Clock: Your Kenmore gas range features a user-friendly digital clock for accurate timekeeping. To set the clock, typically you’ll press and hold the ‘Clock’ button until the hour display flashes. Use the number pads to enter the correct hour, then press ‘Clock’ again. Repeat this process for the minutes. Ensure you’ve selected the correct AM or PM setting.

Utilizing the Timer: The timer function allows you to conveniently track cooking times. Press the ‘Timer’ button, then enter the desired cooking time using the number pads. Press ‘Start’ to activate the timer. A visual display and audible alarm will alert you when the set time has elapsed. The timer can operate independently of the oven or surface burners, providing versatile timing options for all your culinary needs.

Oven Control Panel Overview

Key Components: The Kenmore gas range control panel is designed for intuitive operation. You’ll find dedicated function buttons for ‘Bake’, ‘Broil’, and ‘Convection Bake’, allowing easy selection of your desired cooking mode. Number pads facilitate precise temperature setting and timer input. A digital display clearly shows the set temperature, timer countdown, and clock time.

Mode Indicators: Illuminated indicators signal when the oven is actively heating or when the self-cleaning cycle is in progress. The ‘Start’ button initiates the selected cooking function, while the ‘Clear/Off’ button cancels operations or turns off the oven. Familiarize yourself with these controls to maximize your cooking experience and ensure safe, efficient operation of your Kenmore gas range.

Self-Cleaning Cycle

Convenience Feature: Your Kenmore gas range features a self-cleaning cycle for effortless oven maintenance. This high-heat process burns off food residue, eliminating the need for manual scrubbing. Before initiating, remove oven racks, cookware, and any loose debris. Ensure proper ventilation by opening windows, as the cycle produces odors.

Cycle Duration & Safety: The self-clean cycle typically lasts several hours, during which the oven door automatically locks for safety. Do not attempt to open the door during operation. Once complete, allow the oven to cool completely before unlocking and removing any ash residue. Always supervise children and pets during and after the self-cleaning process.

Preparing for Self-Clean

Essential Steps: Prior to initiating the self-clean cycle on your Kenmore gas range, thorough preparation is crucial for optimal results and safety. Begin by removing all oven racks, baking stones, thermometers, and any aluminum foil. Wipe up any large spills or loose food particles from the oven floor to minimize smoke and odor during the high-heat process.

Door & Ventilation: Ensure the oven door can fully close and seal. Open windows in your kitchen to provide adequate ventilation, as the self-clean cycle generates fumes. Remove any items stored within the oven, and double-check for forgotten utensils. A clean oven ensures a more efficient and safer self-cleaning experience.

Self-Clean Cycle Duration & Safety

Cycle Length: The self-clean cycle on your Kenmore gas range typically lasts between 2 to 4 hours, depending on the level of soil. Avoid interrupting the cycle once it has begun, as this could damage the oven’s control system. The oven door will automatically lock during the process and remain locked until it cools sufficiently.

Safety Precautions: Never attempt to force the oven door open while it’s locked. Keep children and pets away from the oven during the self-clean cycle due to the extremely high temperatures. Be aware that fumes may be released, so ensure proper ventilation. After the cycle completes, allow the oven to cool completely before removing any ash residue.

Troubleshooting Common Issues

Facing problems? This section addresses frequent concerns like burners failing to ignite, ovens not heating, error codes, and handling a gas smell safely.

Burner Won’t Light

Troubleshooting a non-igniting burner requires a systematic approach. First, ensure the gas supply is connected and turned on. Verify the igniter is clicking; if not, a faulty igniter or a problem with the spark module could be the cause.

Check if the burner ports are clogged with food debris – a common issue. Carefully clean them with a thin wire or needle. Also, confirm the burner cap is correctly positioned; misalignment can prevent ignition.

If the igniter clicks but the gas doesn’t light, there might be an issue with the gas valve. Do not attempt to repair the gas valve yourself; contact a qualified technician for assistance. A persistent failure to light indicates a potential safety hazard requiring professional attention.

Oven Not Heating

If your Kenmore gas range oven isn’t heating, several factors could be at play. Initially, verify the oven is set to the correct baking or broiling mode and the temperature is appropriately programmed using the control panel. Ensure the door is fully closed, as a slightly ajar door can trigger a safety shut-off.

Inspect the bake element (if applicable) for any visible damage or breaks. A faulty heating element is a common cause. Also, check the igniter within the oven; a failing igniter won’t initiate gas flow.

If these checks don’t resolve the issue, a problem with the gas valve or the oven control board may exist. Contact a qualified appliance repair technician for diagnosis and repair – do not attempt to fix these components yourself.

Error Codes & Their Meanings

Your Kenmore gas range utilizes error codes to signal potential issues, aiding in troubleshooting. While specific codes vary by model (like 74343), a consistent display indicates a problem requiring attention. Unfortunately, detailed error code lists aren’t readily available publicly for all Kenmore ranges.

However, common errors often relate to the igniter, gas supply, or temperature sensor. A flashing “F” or a numerical code (e.g., E1, E2) usually signifies a fault. Refer to the complete manual (available through resources like Manualzilla – identifier manualzilla-id-7020551) for a comprehensive list specific to your model.

If you encounter an error code not listed in the manual, or if the problem persists, contact Kenmore customer support or a qualified appliance repair technician for assistance.

Gas Smell – What to Do

If you detect a gas odor, safety is paramount! Immediately extinguish any open flames or ignition sources – do not operate any electrical switches, including lights. Do not attempt to locate the source of the leak yourself.

Evacuate everyone from the building and proceed to a safe location. Once outside, contact your local gas company or the fire department from a neighbor’s phone or mobile device. Do not use your phone inside the building.

Allow trained professionals to investigate and resolve the issue before re-entering. Ensure proper ventilation after the leak is repaired, and have your Kenmore range (model 74343) inspected by a qualified technician.

Maintenance & Care

Regular cleaning extends your Kenmore gas range’s life! This section details how to clean the cooktop, oven interior, and racks for optimal performance.

Cleaning the Cooktop

Maintaining a clean cooktop is crucial for efficient operation and appearance. After each use, allow the cooktop to cool completely before cleaning. For everyday spills and splatters, a simple wipe-down with a damp cloth and mild dish soap is usually sufficient. Avoid abrasive cleaners, scouring pads, or steel wool, as these can damage the surface.

For stubborn, baked-on messes, consider using a cooktop cleaning cream specifically designed for gas ranges. Apply the cream, let it sit for a few minutes as directed on the product label, and then gently scrub with a non-abrasive sponge. Rinse thoroughly with clean water and dry with a soft cloth.

Remove and wash the burner grates and caps separately with warm, soapy water. Ensure they are completely dry before replacing them on the cooktop. Regularly inspect the burner ports for any blockages and clear them as needed.

Cleaning the Oven Interior

Regular cleaning keeps your Kenmore oven performing optimally. For light cleaning, wipe down the interior with a damp cloth and mild dish soap after each use, avoiding abrasive cleaners. For more thorough cleaning, especially after spills or heavy use, utilize the self-cleaning cycle – detailed in a separate section of this manual.

If you prefer manual cleaning, remove oven racks and soak them in warm, soapy water. Inside the oven, apply a non-abrasive oven cleaner, following the manufacturer’s instructions carefully. Allow sufficient dwell time, then wipe clean with a damp cloth, rinsing thoroughly to remove all cleaner residue.

Avoid spraying cleaner directly onto the oven’s heating elements or gas burner. Always ensure the oven is cool before cleaning.

Replacing Oven Racks

Oven racks may need replacement due to rust, damage, or wear over time. Before attempting replacement, ensure the oven is completely cool and disconnected from the power source for safety. Gently slide the old rack out of its supports within the oven cavity.

New Kenmore oven racks can be purchased from authorized appliance parts retailers, specifying your model number (e.g., 74343) to ensure compatibility. Carefully slide the new rack into the desired rack position supports, ensuring it sits securely and level.

Avoid forcing the rack, as this could damage the oven’s interior. Regularly cleaning the racks can extend their lifespan and reduce the need for frequent replacements.

Long-Term Storage Instructions

If storing your Kenmore gas range for an extended period, proper preparation is crucial. First, thoroughly clean the cooktop and oven interior to prevent odors and pest attraction. Disconnect the gas supply at the shut-off valve and cap the line securely.

Remove all removable parts, like oven racks and burner grates, storing them separately in a dry place. Secure the oven door closed to prevent damage during storage. Cover the range with a breathable cloth to protect it from dust and scratches.

Store in a dry, well-ventilated area, avoiding extreme temperatures or humidity. Before resuming use, inspect gas connections for leaks and ensure proper ventilation.

silent knight 6820 manual

Silent Knight 6820 Manual: A Comprehensive Guide

This manual details the Silent Knight 6820 fire alarm control panel‚ covering installation‚ programming‚ operation‚ and maintenance for optimal system performance and safety.

The Silent Knight 6820 is a versatile‚ addressable fire alarm control panel designed for a wide range of applications‚ from small commercial buildings to large‚ complex facilities. This manual provides comprehensive guidance for installers‚ technicians‚ and end-users‚ ensuring proper system setup‚ operation‚ and maintenance. It’s crucial to understand the panel’s capabilities to maximize fire safety and minimize false alarms.

The 6820 offers advanced features like zone mapping‚ event logging‚ and flexible programming options. Its robust design and reliable performance make it a trusted choice in the fire protection industry. This guide will walk you through each step‚ from initial installation and wiring to advanced programming and troubleshooting. Familiarizing yourself with the panel’s components and functionalities is essential for effective fire safety management.

System Overview and Components

The Silent Knight 6820 system comprises several key components working in harmony to provide reliable fire detection and notification. These include the main control panel‚ addressable initiating devices (smoke detectors‚ heat detectors‚ pull stations)‚ notification appliances (horns‚ strobes)‚ and a battery backup system for power outages. The panel’s central processing unit (CPU) manages all system functions‚ monitoring device status and responding to alarm conditions.

Additional components may include remote annunciators for displaying system information in remote locations‚ and communication modules for transmitting alarm signals to a central monitoring station. Understanding the function of each component and how they interact is vital for effective system maintenance and troubleshooting. Proper installation and configuration of these elements ensure optimal performance and adherence to fire safety codes.

Installation and Wiring

Proper installation and wiring are crucial for the Silent Knight 6820’s reliable operation‚ adhering to all national and local electrical codes and standards.

Panel Mounting and Physical Installation

Securely mounting the Silent Knight 6820 panel is paramount for long-term stability and functionality. Choose a location that is easily accessible for maintenance‚ yet protected from physical damage and environmental factors like extreme temperatures or moisture. The enclosure should be mounted on a solid surface‚ utilizing appropriate hardware for the wall type – ensuring it can support the panel’s weight‚ plus any added components.

Maintain adequate clearances around the panel for proper ventilation and wiring access. Refer to the detailed dimensional drawings in the manual for specific mounting requirements and knockout locations. Before commencing wiring‚ verify the panel is properly grounded according to local electrical codes. Carefully inspect the enclosure for any damage incurred during shipping and handling‚ and address any issues before proceeding with installation.

Always de-energize the circuit before making any connections.

Wiring Diagrams and Conventions

The Silent Knight 6820 utilizes standardized wiring conventions for consistent and reliable system operation. Detailed wiring diagrams are provided within this manual‚ illustrating typical configurations for various initiating devices‚ notification appliances‚ and communication modules. Always adhere strictly to these diagrams to prevent malfunctions and ensure proper system functionality.

Understanding wire color codes is crucial; typically‚ red signifies power‚ black is common‚ and yellow represents initiating device circuits. However‚ always verify specific wire designations within the diagrams. Employ proper wiring techniques‚ including using appropriately sized wire gauges and secure terminations‚ to minimize resistance and prevent signal degradation.

Pay close attention to polarity when connecting power supplies and other DC-powered devices. Incorrect wiring can cause damage to the panel or connected components.

Device Circuit Supervision

The Silent Knight 6820 panel provides comprehensive device circuit supervision‚ continuously monitoring the integrity of all wiring connected to initiating and notification devices. This feature detects open circuits‚ short circuits‚ and ground faults‚ immediately alerting personnel to potential issues. Regular supervision ensures the system’s reliability and responsiveness in emergency situations.

Each zone is individually supervised‚ allowing for precise identification of the location of a fault. The panel displays specific trouble indicators‚ pinpointing the affected circuit or device. Addressing these faults promptly is critical for maintaining system integrity.

End-of-line (EOL) resistors are essential for proper supervision. Ensure the correct resistance value is used for each circuit‚ as specified in the programming section of this manual.

Programming the 6820 Panel

Configure the 6820 panel through a user-friendly interface‚ customizing zone definitions‚ system constants‚ and operational parameters to meet specific site requirements and safety codes.

Entering Programming Mode

Accessing the programming functions of the Silent Knight 6820 requires a specific sequence to prevent accidental alterations to the system configuration. Typically‚ this involves utilizing the panel’s keypad and navigating through a series of menus. Begin by ensuring the panel is in a non-alarm state and that you possess the appropriate access code‚ often designated as the “Installer Code.”

Press and hold the “Enter” key while simultaneously entering the four-digit Installer Code. Upon successful entry‚ the display will transition to the programming mode prompt. If an incorrect code is entered multiple times‚ the system may initiate a lockout period‚ requiring a delay before further attempts are permitted. Refer to the full manual for specific code defaults and lockout procedures. Once in programming mode‚ utilize the arrow keys to navigate the various programming options‚ carefully reviewing each setting before making changes.

Zone Programming and Configuration

Zone programming within the Silent Knight 6820 is crucial for defining how the system responds to alarm activations from specific detection devices. Each zone represents a physical area or circuit within the protected premises. Configuration involves assigning a descriptive name to each zone (e.g.‚ “Front Entrance‚” “Server Room”)‚ and selecting its operational characteristics.

Key settings include the zone type – normally open‚ normally closed‚ or latching – which dictates how the panel interprets signals. You’ll also define sensitivity levels‚ cross-zoning options (requiring multiple zones to activate for an alarm)‚ and alarm/trouble relay assignments. Proper zone configuration ensures accurate alarm identification and minimizes false alarms. Detailed zone maps and device listings are essential during this process. Remember to save all changes after completing the zone programming sequence.

System Constants and Global Settings

System constants and global settings within the Silent Knight 6820 define the overall operational behavior of the fire alarm control panel. These settings impact the entire system‚ rather than individual zones. Key parameters include the communication baud rate for off-site monitoring‚ the walk test timer duration‚ and the alarm verification settings.

Global settings also control features like the automatic silence switch functionality‚ the panel’s date and time display‚ and the sensitivity of trouble condition alerts. Adjusting these constants requires careful consideration‚ as incorrect values can compromise system reliability. Always document any changes made to these settings and adhere to local fire codes. Proper configuration ensures consistent and predictable system performance across all zones and devices.

System Operation and Features

The Silent Knight 6820 offers robust alarm indication‚ system reset capabilities‚ and reliable battery backup‚ ensuring continuous operation during power outages.

Alarm Indication and Response

Upon detecting an alarm condition‚ the Silent Knight 6820 panel provides clear and immediate indication through its integrated annunciator and remote notification capabilities. The system utilizes both audible and visual signals to alert occupants‚ including distinct tones for fire‚ tamper‚ and trouble conditions.

The panel’s response is highly configurable‚ allowing for programmed sequences such as activating notification appliance circuits (NACs) to sound horns and strobes‚ initiating communication with a central monitoring station‚ and unlocking doors for egress. Zone identification displays pinpoint the location of the alarm‚ facilitating rapid response by emergency personnel.

Sensitivity adjustments and cross-zoning features minimize false alarms while maximizing system reliability. Detailed event logging provides a comprehensive history of all alarm activations‚ system events‚ and maintenance activities‚ aiding in post-incident analysis and troubleshooting. Proper configuration ensures a swift and effective response to any detected emergency.

System Reset and Troubleshooting

Resetting the Silent Knight 6820 panel after an alarm requires understanding the system’s latching and non-latching configurations. A manual reset‚ typically initiated via a key switch or authorized user code‚ clears the alarm condition and restores the system to normal operation. However‚ some zones may require a supervisory reset after addressing the initiating device.

Troubleshooting involves utilizing the panel’s diagnostic features‚ including zone status indicators‚ trouble codes displayed on the LCD‚ and event logging. Common issues like ground faults‚ open circuits‚ and low battery conditions are easily identified through these tools.

Referencing the comprehensive troubleshooting guide within this manual‚ alongside online resources‚ assists in resolving more complex problems. Always prioritize safety and consult a qualified technician for repairs involving electrical components or programming modifications. Regular testing and maintenance minimize the likelihood of system failures.

Battery Backup and Power Supply

The Silent Knight 6820 relies on a robust power supply with integrated battery backup to ensure uninterrupted operation during power outages. The system is designed to automatically switch to battery power upon AC loss‚ maintaining alarm monitoring and notification capabilities.

Regular battery testing is crucial; the panel provides diagnostic tools to assess battery health and remaining capacity. Batteries typically require replacement every 3-5 years‚ depending on environmental conditions and usage. Proper battery maintenance extends lifespan and reliability.

The power supply input accepts standard AC voltage‚ and the panel includes surge protection to safeguard against electrical spikes. Always verify correct voltage and polarity during installation. A dedicated circuit is recommended to prevent interference from other devices. Consult a qualified electrician for any power supply related concerns.

Advanced Features and Integrations

The Silent Knight 6820 offers remote access‚ integration with other security platforms‚ and supports diverse communication protocols like IP and serial connectivity.

Remote Access and Control

The Silent Knight 6820 panel facilitates comprehensive remote access and control capabilities‚ enhancing system management and responsiveness. Utilizing compatible communication modules‚ authorized personnel can monitor system status‚ acknowledge alarms‚ and even perform certain programming functions from a remote location. This feature proves invaluable for facilities managers overseeing multiple sites or for situations requiring off-site monitoring during emergencies.

Secure web-based interfaces and mobile applications provide intuitive access to critical system information. Users can view zone status‚ event logs‚ and historical data‚ enabling proactive maintenance and informed decision-making. Remote control functionalities allow for system resets and silencing of alarms‚ minimizing downtime and ensuring swift response. Robust security protocols‚ including encryption and user authentication‚ safeguard against unauthorized access and maintain system integrity.

Integration with Other Security Systems

The Silent Knight 6820 panel offers versatile integration options with a wide range of other security systems‚ creating a unified and comprehensive security infrastructure. It seamlessly interfaces with access control systems‚ allowing for coordinated responses to security breaches – for example‚ automatically unlocking doors upon fire alarm activation. Integration with video surveillance systems enables visual verification of alarms‚ reducing false positives and improving incident response times;

Furthermore‚ the 6820 supports communication with building automation systems (BAS)‚ facilitating automated actions like shutting down HVAC systems to prevent smoke spread. Utilizing industry-standard communication protocols‚ the panel can exchange data with other security devices and platforms‚ enhancing overall system awareness and control. This interoperability streamlines security management and provides a holistic view of facility security.

Communication Protocols (e.g.‚ IP‚ Serial)

The Silent Knight 6820 panel utilizes several communication protocols to ensure reliable and flexible connectivity. IP communication‚ via Ethernet‚ enables remote access for monitoring‚ programming‚ and reporting‚ facilitating off-site management and diagnostics. Serial communication (RS-485) provides a robust connection for local devices like annunciators and printers‚ ensuring dependable data transmission within the system.

Additionally‚ the panel supports various reporting formats‚ including SIA DC09‚ allowing seamless integration with central monitoring stations. These protocols enable real-time event notification and alarm verification. The 6820’s communication capabilities are designed for scalability and adaptability‚ accommodating diverse system configurations and future expansion needs‚ ensuring long-term reliability and functionality.

Maintenance and Testing

Regular inspections‚ battery checks‚ and functional tests are crucial for maintaining the Silent Knight 6820’s reliability and ensuring optimal system performance.

Regular Inspection Procedures

Consistent visual inspections are paramount for the Silent Knight 6820 system’s integrity. Examine the control panel for any physical damage‚ ensuring the enclosure is secure and free from obstructions. Verify that all wiring connections remain tight and appropriately labeled‚ checking for signs of corrosion or fraying. Inspect all initiating devices – smoke detectors‚ heat detectors‚ pull stations – for cleanliness and proper mounting.

Confirm that notification appliances (horns‚ strobes) are unobstructed and functioning correctly. Review the system’s event log for any recent alarms‚ troubles‚ or supervisory signals‚ documenting any findings. A detailed logbook should record all inspection dates‚ findings‚ and corrective actions taken. These procedures‚ performed routinely‚ contribute significantly to the system’s long-term reliability and adherence to fire safety codes.

Battery Testing and Replacement

The Silent Knight 6820 relies on battery backup during power outages; therefore‚ regular battery testing is crucial. Perform a load test at least annually‚ or more frequently in harsh environments‚ to assess battery capacity and health. Utilize a battery load tester to simulate a power failure and measure the voltage drop under load. Batteries failing to maintain specified voltage levels must be replaced immediately.

When replacing batteries‚ always use the manufacturer-recommended type and capacity. Disconnect the old batteries and carefully connect the new ones‚ observing proper polarity. After replacement‚ allow the batteries to charge fully before conducting another load test. Document all battery testing and replacement activities in the system’s logbook‚ ensuring a traceable history of battery maintenance.

Functional Testing of System Components

Thorough functional testing of all Silent Knight 6820 system components is essential to verify proper operation and ensure reliable fire detection. Initiate tests by activating each initiating device (smoke detectors‚ pull stations‚ etc.) individually and observing the corresponding alarm indication at the panel and remote notification appliances. Verify that the alarm signal is transmitted to the central monitoring station‚ if applicable.

Additionally‚ test all notification appliances (horns‚ strobes) to confirm audibility and visibility throughout the protected premises. Walk-test the system regularly‚ simulating various fire scenarios to assess response times and identify any potential issues. Document all test results‚ including dates‚ times‚ and any discrepancies found‚ in the system’s maintenance log.

fujitsu fi 7160 manual

Fujitsu Fi-7160 Manual: A Comprehensive Guide

This comprehensive guide celebrates your new Fujitsu Fi 7160, offering a roadmap for successful operation and detailing essential parts diagrams and user instructions.

Fujitsu Scanner FI-7160 user manual provides detailed information, addressing common issues and maintenance procedures for optimal performance and longevity.

The Fujitsu Fi-7160 represents a significant advancement in document imaging, designed for businesses demanding high-speed, reliable scanning. This manual serves as your primary resource for understanding and maximizing the capabilities of this powerful scanner. It’s geared towards both novice and experienced users, offering step-by-step instructions and troubleshooting guidance.

As highlighted in various online resources, the Fi-7160 is a production-level scanner, built for demanding workloads. This guide will walk you through unboxing, setup, operation, and maintenance, ensuring optimal performance. It addresses potential issues, like those reported with driver compatibility on older systems, and provides solutions.

Congratulations on your purchase! This manual, alongside the scanner itself, empowers you to efficiently digitize and manage your documents. We aim to provide a seamless experience, from initial setup to long-term operation.

Key Features and Specifications

The Fujitsu Fi-7160 boasts exceptional speed, handling up to 70 ppm/140 ipm (simplex/duplex) with 300 dpi resolution. It features automatic document feeder (ADF) capacity of 500 sheets, minimizing manual intervention. Its robust design ensures reliability for high-volume scanning tasks.

Key specifications include USB 3.2 connectivity and compatibility with various operating systems. While driver support for older models like the AH531 might require investigation, the Fi-7160 generally offers broad compatibility.

Image processing functions enhance scan quality, and features like barcode recognition and zone scanning further streamline workflows. The scanner’s compact footprint is ideal for diverse office environments. This manual details how to leverage these features for optimal document digitization, addressing potential connectivity issues and ensuring smooth operation.

Setting Up Your Scanner

Proper setup is crucial for optimal performance. This section guides you through unboxing, hardware connections, and software/driver installation for seamless operation.

Unboxing and Initial Inspection

Carefully unpack your Fujitsu Fi-7160 scanner and verify all components are present. The package should include the scanner unit itself, a power cord, a USB cable for connection to your computer, and potentially any included software installation discs or quick start guides.

Thoroughly inspect the scanner for any visible signs of shipping damage, such as dents, scratches, or broken parts. Pay close attention to the glass platen, ensuring it’s free from cracks or imperfections. Retain the original packaging materials for potential future transport or warranty claims.

Confirm the model number and serial number on the scanner match those on your purchase invoice. If any discrepancies or damage are found, immediately contact Fujitsu support or your reseller for assistance. Do not attempt to operate a damaged scanner.

Hardware Installation and Connections

Connect the provided power cord to the scanner and a grounded electrical outlet. Ensure the outlet voltage matches the scanner’s requirements. Next, connect the USB cable to the scanner and an available USB port on your computer. For optimal performance, use a USB 2.0 or higher port.

If utilizing network connectivity, refer to the scanner’s network setup guide for instructions on configuring an Ethernet connection. Verify the network cable is securely connected to both the scanner and your network router or switch.

Power on the scanner using the power button. Allow the scanner to complete its initialization sequence before proceeding with software installation. Avoid forcing the scanner on or off, as this could potentially damage internal components.

Software Installation and Driver Setup

Download the latest drivers and software suite for your Fujitsu Fi-7160 from the official Fujitsu website. Ensure you select the correct version compatible with your operating system (Windows, macOS). Run the downloaded installer and follow the on-screen prompts.

During installation, accept the license agreement and choose your preferred installation directory. The software package typically includes scanning utilities, image processing tools, and TWAIN/WIA drivers for compatibility with various applications.

After installation, restart your computer to ensure all drivers are loaded correctly. Verify the scanner is recognized by your operating system through Device Manager. If issues arise, consult the troubleshooting section of this manual.

Understanding the Scanner Interface

Explore the Fi-7160’s control panel, status indicators, and software interface for seamless operation. Familiarize yourself with lights and navigation for optimal scanning.

Control Panel Overview

The Fujitsu Fi-7160’s control panel is designed for intuitive operation, offering quick access to essential scanner functions. Key buttons include the Scan/Start button, initiating the scanning process, and the Stop/Eject button, halting operations and releasing documents. LED indicators clearly display the scanner’s current status – Ready, Scanning, or Error – providing immediate feedback;

Additional buttons may control power functions and potentially offer access to specific scanning modes or settings. The panel’s layout prioritizes ease of use, ensuring operators can quickly and efficiently manage scanning tasks. Understanding these controls is crucial for maximizing the scanner’s productivity and troubleshooting potential issues. Refer to the detailed diagrams within this manual for precise button locations and functions.

Status Indicators and Lights

The Fujitsu Fi-7160 utilizes a system of status indicators and lights to communicate its operational state. A solid green light typically signifies the scanner is ready for operation, while a blinking green light often indicates active scanning. Amber or red lights signal errors or warnings, requiring immediate attention.

Specific light patterns can denote different error types, such as paper jams or connectivity issues. Consult the troubleshooting section of this manual for a comprehensive interpretation of each light combination. Understanding these visual cues is vital for efficient operation and rapid problem resolution. Regularly monitoring these indicators ensures optimal scanner performance and prevents prolonged downtime.

Software Interface Navigation

The Fujitsu Fi-7160’s software interface provides comprehensive control over scanning operations. Key sections include the main scan window, settings menus, and job management area. Navigating the interface is intuitive, utilizing tabs and drop-down menus for easy access to various functions.

Users can customize scan profiles, adjust image settings, and monitor scan progress within the software. The software allows for batch scanning setup, document separation rules, and output destination selection. Familiarizing yourself with the software’s layout and features is crucial for maximizing the scanner’s capabilities and streamlining your workflow. Detailed explanations of each function are available in the software’s help documentation.

Scanning Procedures

Mastering scanning with the Fi-7160 involves basic operations, advanced settings adjustments, and efficient batch processing for seamless document digitization.

Basic Scanning Operations

Initiating a scan with the Fujitsu Fi-7160 is straightforward. Ensure the scanner is powered on and connected to your computer. Load documents into the automatic document feeder (ADF), aligning them neatly to prevent skewing.

Open the scanner’s software interface and select your desired scanning profile – often a pre-configured setting for common tasks like daily scanning or archiving. Click the “Scan” button to begin. The Fi-7160 will automatically feed, scan, and process the documents.

Monitor the progress through the software interface, which displays the number of pages scanned and any potential errors. Once complete, the scanned images will be saved to your designated folder in the selected file format (PDF, TIFF, JPEG, etc.). Basic operations prioritize speed and simplicity for everyday scanning needs.

Advanced Scanning Settings (Resolution, Color Mode)

The Fujitsu Fi-7160 offers granular control over scan quality through advanced settings. Resolution (DPI) directly impacts image clarity; higher DPIs (e.g., 600 DPI) are ideal for detailed documents or OCR, while lower DPIs (e.g., 300 DPI) suffice for general archiving.

Color Mode selection is crucial. Choose Black & White for text-only documents to minimize file size. Grayscale is suitable for images with subtle shading, and Color is essential for photographs or documents with vibrant colors.

Experiment with these settings to balance image quality and file size. The software interface allows for previewing scans with different configurations before finalizing the scan job, ensuring optimal results for diverse document types.

Batch Scanning and Document Separation

The Fujitsu Fi-7160 excels at batch processing, significantly increasing efficiency when dealing with large volumes of documents. Utilize the automatic document feeder (ADF) to load multiple pages, streamlining the scanning workflow.

Document separation is key for organized output. The scanner’s software offers features like blank page detection and barcode recognition to automatically split scans into individual files. Configure these settings to define separation criteria based on your needs.

Proper document preparation – removing staples and ensuring pages are aligned – minimizes errors. Preview scans to verify correct separation before saving, ensuring a clean and organized digital archive.

Troubleshooting Common Issues

Addressing potential problems like paper handling errors, connectivity glitches, and driver conflicts ensures optimal scanner performance and minimizes workflow disruptions.

Paper Handling Problems (Skew, Multi-feed)

Addressing paper skew and multi-feed errors is crucial for efficient scanning. Ensure documents are properly aligned before loading, and adjust the separation settings within the scanner software. Regularly clean the feed rollers with a lint-free cloth and isopropyl alcohol to remove dust and debris that can cause feeding issues.

If skew persists, verify the document guides are correctly positioned and making firm contact with the paper edges. For multi-feed errors, reduce the stack height and confirm the document weight is within the scanner’s specifications. Experiment with different scanning profiles to optimize performance for various paper types.

Consult the manual for detailed instructions on adjusting feed settings and troubleshooting specific error codes related to paper handling. Proper maintenance and careful document preparation will significantly reduce these common issues.

Connectivity Issues (USB, Network)

Establishing a stable connection is vital for seamless scanning. If experiencing USB connectivity problems, try a different USB port and cable, ensuring the cable meets the scanner’s specifications. Verify the Fujitsu Fi-7160 is recognized by your operating system’s device manager, and reinstall the drivers if necessary.

For network connectivity, confirm the scanner is properly connected to the network and has a valid IP address. Check network settings within the scanner’s control panel or web interface. Ensure firewall settings aren’t blocking communication between the scanner and your computer.

Refer to the manual for detailed network configuration instructions and troubleshooting steps. A secure and reliable connection is essential for optimal scanner performance and data transfer.

Driver Errors and Software Conflicts

Driver issues can disrupt scanner functionality. Ensure you’ve installed the latest, compatible drivers from the official Fujitsu website. Older drivers, or those designed for different operating systems, can cause errors; Completely uninstall previous driver versions before installing new ones, utilizing a driver removal tool if needed.

Software conflicts may arise with other scanning applications or imaging software. Temporarily disable or uninstall potentially conflicting programs to isolate the issue. Check for compatibility information on the Fujitsu support website.

The manual provides guidance on resolving common driver errors and software conflicts. Regularly updating drivers and managing software installations will maintain optimal scanner performance and prevent operational disruptions.

Maintenance and Care

Regular cleaning and preventative maintenance are crucial for optimal performance. Replace consumable parts as needed, following the schedule outlined in this manual for longevity.

Cleaning the Scanner

Maintaining a clean scanner is vital for consistent, high-quality performance and extends the lifespan of your Fujitsu Fi-7160. Begin by powering off the scanner and disconnecting it from the power source to ensure safety. Use a soft, lint-free cloth, lightly dampened with isopropyl alcohol, to gently wipe down the exterior surfaces.

Pay particular attention to the document feed area, removing any dust or paper debris that may accumulate. For the rollers, use a specialized scanner cleaning sheet, available from Fujitsu or authorized retailers, to remove any residue that could cause paper handling issues. Avoid using abrasive cleaners or excessive moisture, as these can damage the scanner’s components.

Regular cleaning, performed at least weekly or more frequently with heavy use, will prevent build-up and ensure optimal scanning results. Always allow the scanner to dry completely before reconnecting it to the power source and resuming operation.

Replacing Consumable Parts

The Fujitsu Fi-7160 requires periodic replacement of consumable parts to maintain peak performance. Key components include the rollers, which may wear down with extensive use, leading to paper feed issues. Regularly inspect the rollers for damage or debris buildup. Replacement kits are readily available through Fujitsu and authorized distributors.

When replacing parts, always power off and disconnect the scanner for safety. Consult the parts diagram within this manual to identify the correct components and their proper placement. Follow the detailed instructions provided with the replacement kit, ensuring a secure and accurate installation.

Proper replacement of consumable parts will prevent scanning errors and prolong the overall life of your Fi-7160. Keep a record of replacement dates for preventative maintenance scheduling.

Preventative Maintenance Schedule

To ensure optimal performance and longevity of your Fujitsu Fi-7160, adhere to a regular preventative maintenance schedule. Daily, visually inspect the scanner for any obstructions or debris. Weekly, clean the exterior surfaces with a soft, lint-free cloth. Monthly, thoroughly clean the rollers and scanning glass using recommended cleaning solutions.

Every six months, inspect and replace consumable parts like the rollers, as needed, based on usage. Annually, consider a professional service check-up to identify and address potential issues before they escalate. Maintaining a log of all maintenance activities is highly recommended.

Following this schedule will minimize downtime, prevent costly repairs, and guarantee consistent, high-quality scanning results from your Fi-7160.

Advanced Features

Explore powerful capabilities like image processing, barcode recognition, and zone scanning to optimize workflows and extract valuable data efficiently with your Fi-7160.

Image Processing Functions

The Fujitsu Fi-7160 boasts a suite of advanced image processing functions designed to significantly enhance scan quality and optimize documents for various applications. These features go beyond basic scanning, allowing for automated improvements that reduce manual intervention and improve overall efficiency.

Automatic Image Enhancement (AIE) intelligently analyzes each scanned image and automatically adjusts brightness, contrast, and sharpness to produce clear, legible results. Deskewing corrects skewed images, ensuring straight and properly aligned documents. Blank Page Removal automatically detects and eliminates blank pages, reducing file sizes and streamlining document management.

Furthermore, the scanner offers powerful tools for noise reduction, speckle removal, and color dropout, allowing you to tailor image processing to specific document types and requirements. These functions contribute to improved OCR accuracy and enhanced visual clarity, making the Fi-7160 a versatile solution for diverse scanning needs.

Barcode Recognition

The Fujitsu Fi-7160 incorporates robust barcode recognition capabilities, streamlining data extraction and automating workflows. This feature allows the scanner to automatically identify and decode various barcode symbologies, eliminating the need for manual data entry and reducing errors.

Supported barcode types include commonly used formats like UPC/EAN, Code 39, Code 128, and QR Code, ensuring compatibility with a wide range of documents and applications. The scanner can be configured to extract barcode data and automatically populate fields in databases or other software applications.

This functionality is particularly valuable for inventory management, shipping and receiving, and document tracking. By automating barcode data capture, the Fi-7160 significantly improves efficiency and accuracy, saving time and resources.

Zone Scanning

The Fujitsu Fi-7160’s Zone Scanning feature provides exceptional control over image capture, allowing users to define specific areas – or “zones” – on a document for focused scanning. This is incredibly useful when only certain portions of a page contain critical information, reducing file sizes and processing time.

Users can customize zones based on coordinates or by visually selecting areas within the software interface. This targeted approach is ideal for forms processing, extracting data from invoices, or isolating specific sections of legal documents.

Zone Scanning enhances OCR accuracy by focusing processing power on relevant areas, minimizing errors and improving data extraction rates. It’s a powerful tool for automating document-centric workflows and maximizing scanner efficiency.

Fujitsu Fi-7160 Parts Diagram

This section details key components, offering guidance for identifying and, when necessary, replacing parts, always prioritizing safety during any repair procedures.

Identifying Key Components

Understanding the Fujitsu Fi-7160’s internal structure is crucial for maintenance and potential repairs. Key components include the document feeder, responsible for smooth paper handling, and the image sensor, which captures document scans. The scanner’s control panel, featuring buttons and indicators, allows for operational adjustments.

Internally, locate the logic board, the central processing unit, and the power supply unit. The consumable parts, like the rollers, require periodic replacement to maintain optimal scanning quality. Familiarize yourself with the location of these parts, referencing the detailed diagrams provided within this manual. Proper identification ensures accurate troubleshooting and efficient part replacement when needed, extending the scanner’s lifespan and performance.

Replacing Parts (General Guidance)

When replacing parts on your Fujitsu Fi-7160, always prioritize safety by disconnecting the power supply. Consult the parts diagram to correctly identify the component needing replacement. Exercise caution when handling internal components, avoiding excessive force. Begin by carefully removing any surrounding panels or assemblies, documenting the process for reassembly.

Follow the manufacturer’s instructions precisely, utilizing appropriate tools. Ensure proper alignment during installation, securing all connections firmly. After replacement, thoroughly test the scanner’s functionality to confirm the repair. Remember, improper handling can cause damage; if unsure, seek professional assistance. Always refer to the manual for specific guidance and safety precautions.

Safety Precautions for Repair

Prior to any repair attempt on your Fujitsu Fi-7160, disconnect the power cord to prevent electrical shock. Avoid working with wet hands or in damp environments. Wear appropriate eye protection to shield against potential debris. Be mindful of static electricity; use an anti-static wrist strap to ground yourself before handling internal components.

Never disassemble the scanner beyond what is necessary for the specific repair. Do not attempt to repair power supply components unless qualified. Dispose of damaged parts responsibly, following local regulations. Always consult the manual for detailed safety guidelines and warnings. Ignoring these precautions could result in personal injury or damage to the scanner.

mds rai manual 2023

MDS RAI Manual 2023: A Comprehensive Overview

The MDS RAI Manual provides detailed guidance for accurate resident assessment in skilled nursing facilities‚ ensuring quality reporting and compliance with regulations.

Version 1.19.1‚ released in October 2024‚ alongside its Item Sets‚ reflects the August 7‚ 2023 Final Rule updates‚ accessible via CMS.

Chapter 2‚ from October 2023‚ outlines assessment requirements‚ timelines‚ RN signature stipulations‚ and specific guidance for Swing Bed facilities.

The IMPACT Act of 2014 drives the Skilled Nursing Facility Quality Reporting Program‚ with resources found in Long Term Care Compliance sections.

MDS 3.0 RAI Manual v1.18.11 (October 2023) and associated Errata (September 8‚ 2023) are available for download from the CMS website.

Draft versions‚ like 1.18.11‚ offer previews of upcoming changes‚ while Item Set v1.20.1v4 is accessible in the Downloads section.

Accurate documentation‚ referencing 149.0018.50‚ is crucial for compliance‚ supported by the MDS 3.0 Users Manual and Survey Guide.

The Minimum Data Set (MDS) RAI Manual serves as the cornerstone for standardized resident assessment within Medicare and Medicaid-certified nursing homes. This comprehensive guide‚ continually updated by the Centers for Medicare & Medicaid Services (CMS)‚ details the processes and requirements for collecting crucial resident data.

Initially developed to improve the accuracy of payment systems‚ the MDS RAI has evolved into a vital tool for quality improvement and regulatory compliance. The manual provides detailed instructions on completing the RAI item sets‚ ensuring consistent data collection across facilities.

Understanding the MDS RAI Manual is paramount for all personnel involved in resident assessment‚ including Registered Nurses (RNs)‚ and other healthcare professionals. It’s essential for accurate coding‚ proper documentation‚ and ultimately‚ delivering optimal care to residents. The current version‚ 1.19.1 (October 2024)‚ reflects the latest regulatory changes.

What is the MDS RAI?

The MDS RAI (Resident Assessment Instrument) is a standardized‚ federally mandated data collection tool used in Medicare and Medicaid-certified nursing homes. It’s a comprehensive assessment of each resident’s physical‚ mental‚ and psychosocial functioning.

The MDS consists of various “item sets” – specific questionnaires completed at different intervals (screening‚ comprehensive‚ and 5-day). These assessments cover 18 areas‚ including cognitive skills‚ physical function‚ and activities of daily living. Data collected informs care planning‚ monitors resident progress‚ and drives quality reporting.

The RAI component integrates the MDS data with clinical information to determine a resident’s Resource Utilization Group (RUG) level‚ impacting Medicare reimbursement. Version 3.0‚ with current updates like 1.19.1 (October 2024)‚ ensures consistent and accurate data for both quality measurement and payment accuracy‚ as outlined by CMS.

Purpose of the MDS RAI Manual

The MDS RAI Manual serves as the definitive guide for consistent and accurate completion of resident assessments in skilled nursing facilities. Its primary purpose is to provide detailed instructions and clarifications regarding each item within the MDS 3.0 framework.

This manual ensures compliance with federal regulations‚ particularly those stemming from the IMPACT Act of 2014‚ which emphasizes quality reporting. It supports facilities in accurately determining a resident’s care needs‚ developing individualized care plans‚ and monitoring their progress over time.

Furthermore‚ the manual facilitates appropriate Medicare reimbursement by accurately classifying residents into Resource Utilization Groups (RUGs). Updated versions‚ like v1.18.11 and 1.19.1‚ reflect changes in regulations and best practices‚ ensuring facilities utilize the most current guidance from CMS.

Key Updates & Versions (as of February 27‚ 2026)

Current versions include RAI MDS 3.0 1.19.1 (October 2024) and Item Sets 1.19.1‚ reflecting the August 2023 Final Rule updates.

RAI MDS 3.0 Version 1.19.1 (October 2024)

Version 1.19.1 of the RAI MDS 3.0‚ released in October 2024‚ represents a significant update to the resident assessment instrument used in skilled nursing facilities.

This version incorporates changes stemming from the August 7‚ 2023 Final Rule‚ impacting assessment processes and data reporting requirements. Facilities are strongly encouraged to familiarize themselves with these modifications to ensure accurate and compliant submissions.

Key resources for understanding Version 1.19.1 include the comprehensive MDS 3.0 RAI Manual available on the CMS website (https://www.cms.gov/medicare/quality/nursing-home-improvement/resident-assessment-instrument-manual).

The manual provides detailed guidance on each item set‚ assessment schedule‚ and coding clarification. Proper implementation of Version 1.19.1 is vital for maintaining quality of care and meeting regulatory standards.

Item Sets Version 1.19.1 (October 2024)

Item Sets Version 1.19.1‚ released alongside the RAI MDS 3.0 update in October 2024‚ are crucial for standardized resident assessments. These sets contain the specific data points required for comprehensive evaluation and quality reporting.

Aligned with the August 7‚ 2023 Final Rule‚ these item sets reflect changes in coding guidelines and assessment methodologies. Accurate completion is paramount for compliant submissions to CMS and participation in quality initiatives.

Facilities can access the Item Sets through the CMS website‚ alongside the detailed MDS 3.0 RAI Manual. Understanding the nuances of each item is essential for reliable data collection.

Version 1.19.1 ensures consistency in assessment practices nationwide‚ contributing to improved resident care and a more robust quality reporting system. Proper training and adherence to the manual are vital.

Final Rule Updates (August 7‚ 2023)

The August 7‚ 2023 Final Rule significantly impacted the MDS RAI Manual‚ introducing changes to assessment procedures and quality reporting requirements for skilled nursing facilities. These updates necessitate a thorough review of the MDS 3.0 guidelines.

Key revisions address coding clarifications‚ updated definitions‚ and modifications to specific item sets‚ directly influencing data submission and compliance. Facilities must integrate these changes into their assessment workflows.

The CMS publication detailing the Final Rule provides comprehensive guidance‚ accessible via the Federal Register. Understanding these modifications is crucial for accurate resident assessments and avoiding penalties.

Version 1.19.1 of the RAI MDS 3.0 and corresponding Item Sets (October 2024) reflect these updates‚ emphasizing the importance of ongoing staff training and adherence to the latest regulations.

Understanding the Assessment Process

Chapter 2 of the RAI Manual (October 2023) details assessment requirements‚ timelines‚ and RN signature protocols for accurate resident evaluations.

Swing Bed facilities must adhere to these guidelines‚ ensuring consistent and compliant data collection for quality reporting.

Chapter 2: Assessments for the RAI (October 2023)

Chapter 2‚ released in October 2023‚ serves as a cornerstone for understanding the assessment procedures within the Resident Assessment Instrument (RAI) framework.

This crucial section meticulously outlines the specific requirements governing assessments‚ including detailed guidance on appropriate timing and adherence to established timeframes for completion.

A significant focus is placed on the Registered Nurse (RN) signature requirements‚ emphasizing the accountability and professional validation necessary for each assessment.

Furthermore‚ Chapter 2 provides tailored instructions specifically for Swing Bed facilities‚ acknowledging their unique operational context and ensuring compliance with all relevant regulations.

It’s essential that personnel in these facilities utilize the manual’s guidance when completing MDS assessments‚ promoting accuracy and consistency in resident data.

This chapter is fundamental for maintaining quality care and meeting reporting obligations.

Assessment Requirements & Timeframes

Assessment Requirements & Timeframes are meticulously detailed within Chapter 2 of the October 2023 RAI Manual‚ ensuring standardized data collection.

Initial assessments must be completed within a specified timeframe upon admission‚ typically within 14 days‚ to establish a baseline of resident characteristics.

Periodic assessments‚ occurring every five days thereafter‚ track changes in resident status and inform care planning decisions.

Significant changes in a resident’s condition trigger the need for a change assessment‚ demanding prompt evaluation and documentation.

The manual clarifies submission timeframes‚ emphasizing timely reporting to CMS for quality reporting and reimbursement purposes.

Adherence to these requirements is paramount for maintaining compliance and ensuring accurate data reflects resident needs.

Properly executed assessments are vital for optimal resident care and facility operations.

RN Signature Requirements

RN Signature Requirements are a critical component of the MDS RAI process‚ validating the accuracy and integrity of resident assessments.

According to Chapter 2 of the October 2023 RAI Manual‚ a registered nurse (RN) must review and attest to the completeness and accuracy of each assessment.

The RN’s signature signifies professional accountability and confirms that the assessment reflects the resident’s current condition and care plan.

Electronic signatures are permissible‚ provided they meet established security and authentication standards.

The RN must possess the appropriate licensure and scope of practice to perform these assessments.

Failure to comply with signature requirements can result in assessment rejections and potential compliance issues.

Proper RN oversight is essential for maintaining data quality and ensuring resident well-being.

Swing Bed Facility Considerations

Swing Bed Facilities‚ offering post-acute care‚ require specific attention to MDS RAI guidelines due to their unique patient population and transitional care model.

The October 2023 RAI Manual emphasizes that these facilities must adhere to all standard MDS assessment requirements‚ but with considerations for shorter lengths of stay.

Accurate assessment upon admission is crucial to establish a baseline and track progress during the swing bed stay.

Discharge assessments are equally important‚ reflecting the resident’s functional status and care needs upon return to the acute care setting.

RN review and signature are mandatory‚ ensuring the assessment accurately portrays the resident’s condition.

Facilities should utilize the manual’s instructions specifically tailored for swing bed services to ensure compliance.

Proper coding and submission of MDS data are vital for accurate quality reporting and reimbursement.

Resources & Manual Access

CMS Website is the primary source for the MDS 3.0 RAI Manual‚ eManual‚ and Survey Guide‚ offering comprehensive guidance and updates.

Interpretive Guidelines clarify regulations‚ while the Downloads section provides current Item Sets like v1.20.1v4 for accurate assessment completion.

Accessing these resources ensures facilities maintain compliance and deliver high-quality resident care.

CMS Website: Primary Resource

The Centers for Medicare & Medicaid Services (CMS) website serves as the definitive‚ central repository for all things related to the MDS RAI Manual and its associated resources. It’s the foundational starting point for anyone involved in resident assessment within skilled nursing facilities.

Here‚ you’ll find direct access to the complete MDS 3.0 RAI Manual in various versions‚ including the latest v1.19.1 released in October 2024‚ alongside historical versions for reference. Crucially‚ the site hosts the frequently updated Item Sets‚ such as v1.20.1v4‚ essential for accurate data submission.

Beyond the core manual‚ CMS provides the MDS 3.0 Users eManual‚ offering a searchable and interactive format. The Survey Guide & Interpretive Guidelines are also readily available‚ clarifying expectations during facility surveys. Furthermore‚ the website details the Final Rule updates from August 7‚ 2023‚ impacting assessment procedures. Regularly checking the Downloads section is vital to ensure you’re utilizing the most current materials.

MDS 3.0 Users Manual eManual

The MDS 3.0 Users Manual eManual‚ accessible through the CMS website‚ offers a dynamic and user-friendly alternative to the traditional PDF manual. This electronic format provides enhanced navigation and search capabilities‚ streamlining the process of locating specific guidance within the complex RAI framework.

Unlike static documents‚ the eManual allows for quick keyword searches‚ enabling users to pinpoint relevant sections related to specific resident conditions or assessment items. It mirrors the content of the official MDS RAI Manual‚ including updates from Version 1.19.1 (October 2024) and the August 7‚ 2023 Final Rule.

This digital resource is particularly valuable for new users learning the intricacies of the MDS‚ as well as experienced professionals needing rapid access to detailed information. It complements the PDF manual and Survey Guide‚ forming a comprehensive suite of tools for ensuring accurate and compliant resident assessments.

Survey Guide & Interpretive Guidelines

The Survey Guide & Interpretive Guidelines for Long-Term Care‚ available as an eManual through CMS‚ is a critical resource for understanding how MDS RAI requirements are applied during facility surveys. This document clarifies expectations regarding compliance with federal regulations and provides detailed interpretations of specific MDS items.

It bridges the gap between the technical details of the MDS 3;0 Users Manual and the practical application of assessment findings. Surveyors utilize these guidelines to evaluate the accuracy and completeness of resident assessments‚ ensuring they reflect the resident’s current condition and care needs.

Updates reflecting Version 1.19.1 (October 2024) and the August 7‚ 2023 Final Rule are incorporated‚ offering current guidance. Understanding these guidelines is essential for facilities aiming to maintain compliance and provide high-quality care‚ avoiding potential deficiencies identified during surveys.

Specific Manual Versions & Dates

MDS 3.0 RAI Manual v1.18.11 was released in October 2023‚ with Errata updates on September 8‚ 2023‚ and October 2023 (R).

Draft version 1.18.11 offered previews‚ while v1.19.1 (October 2024) represents the current standard for accurate assessment documentation.

MDS 3.0 RAI Manual v1.18.11 (October 2023)

Version 1.18.11 of the MDS 3.0 RAI Manual‚ published in October 2023‚ served as the foundational document for resident assessment prior to the subsequent updates.

This version encompassed comprehensive guidelines for completing the Minimum Data Set‚ crucial for quality reporting and compliance within skilled nursing facilities.

It detailed specific instructions for each item set‚ ensuring standardized data collection across all facilities.

CMS released this manual alongside accompanying Change Tables‚ available as zipped files (Part 1‚ Part 2‚ and Part 3) to facilitate easy implementation of the guidelines.

However‚ it’s important to note that Errata was issued on September 8‚ 2023‚ with revised pages marked with a footer indicating “October 2023 (R)‚” signifying corrections and clarifications.

Therefore‚ while v1.18.11 was vital‚ users were advised to integrate the Errata for accurate assessment practices.

This version laid the groundwork for the later v1.19.1 release.

Errata & Revision Dates (September 8‚ 2023 & October 2023 (R))

The MDS 3.0 RAI Manual undergoes continuous refinement‚ necessitating the release of Errata to address inaccuracies or ambiguities within published versions.

On September 8‚ 2023‚ CMS issued a significant Errata document pertaining to MDS 3.0 RAI Manual v1.18.11‚ clarifying several assessment guidelines.

These corrections were crucial for ensuring consistent and accurate data collection across all skilled nursing facilities.

Importantly‚ revised pages within the manual were clearly marked with a footer stating “October 2023 (R)‚” allowing users to quickly identify updated content.

This “(R)” designation signified a revision‚ indicating that the information differed from the original publication.

Facilities were strongly encouraged to integrate these Errata updates into their assessment processes immediately.

Staying current with these revision dates is paramount for maintaining compliance and accurate quality reporting.

Draft MDS 3.0 RAI Users Manual version 1.18.11

CMS proactively releases Draft versions of the MDS 3.0 RAI Users Manual to allow stakeholders to review proposed changes before final implementation.

The Draft MDS 3.0 RAI Users Manual version 1.18.11 provided a preview of updates slated for release with the official v1.18.11 manual in October 2023.

This Draft allowed facilities and assessment teams to familiarize themselves with anticipated modifications to assessment procedures and item set definitions.

Missouri Long-Term Care Information Update highlighted the availability of this Draft‚ emphasizing the opportunity for feedback and preparation.

Reviewing Draft manuals is crucial for proactive compliance and minimizing disruption during official updates.

These Draft releases demonstrate CMS’s commitment to transparency and collaboration within the long-term care community.

Accessing and analyzing these documents ensures a smoother transition to new MDS requirements.

Impact of the IMPACT Act of 2014

The IMPACT Act of 2014 fundamentally shaped quality reporting within skilled nursing facilities‚ driving the Skilled Nursing Facility Quality Reporting Program.

Data submission and reporting requirements‚ guided by the MDS RAI Manual‚ became central to measuring and improving care quality.

CMS leverages MDS data for public transparency and performance-based initiatives‚ impacting facility operations and reimbursement.

Skilled Nursing Facility Quality Reporting Program

The Skilled Nursing Facility Quality Reporting Program (SNF QRP)‚ established by the IMPACT Act of 2014‚ relies heavily on data derived from the MDS RAI Manual and its associated Item Sets.

This program mandates the collection and submission of standardized data elements to CMS‚ enabling the measurement of key quality indicators within skilled nursing facilities.

Data submission is crucial for publicly reporting facility performance on Quality Measures‚ influencing consumer choice and driving quality improvement initiatives.

The MDS 3.0 RAI Manual provides detailed instructions on completing the assessments necessary for participation in the SNF QRP‚ ensuring data accuracy and consistency.

CMS utilizes this data to calculate star ratings‚ impacting facility reimbursement and public perception.

Ongoing updates to the RAI Manual‚ like Version 1.19.1 (October 2024)‚ reflect evolving quality reporting requirements and best practices.

Facilities must adhere to the guidelines outlined in the manual to maintain compliance and participate effectively in the program.

Data Submission & Reporting

Data submission for the MDS RAI is a critical component of the Skilled Nursing Facility Quality Reporting Program‚ facilitated through secure electronic transmission to CMS.

Facilities must adhere to strict timelines and formats outlined in the MDS 3.0 RAI Manual‚ ensuring timely and accurate reporting of resident assessment data.

Item Sets‚ such as v1.20.1v4‚ define the specific data elements required for each assessment type‚ impacting quality measure calculations.

The August 7‚ 2023 Final Rule introduced updates to reporting requirements‚ necessitating careful review of the latest RAI Manual version (1.19.1).

CMS provides resources and support to assist facilities with the submission process‚ including technical specifications and training materials.

Accurate and complete data submission is essential for receiving appropriate Medicare reimbursement and maintaining compliance.

Regular monitoring of submission status and error reports is crucial for identifying and resolving any issues promptly.

Navigating the Manual & Item Sets

CMS offers MDS 3.0 resources‚ including the RAI Manual‚ Item Sets‚ and Downloads‚ for efficient access to current assessment guidelines.

Version 1.20.1v4 is available‚ and locating updated versions requires checking the CMS website regularly for the latest RAI information.

Understanding these resources ensures accurate resident assessments and compliance with evolving regulations.

Downloads Section on the CMS Website

The CMS website’s Downloads section is the central repository for all current MDS 3.0 RAI Manual materials‚ ensuring facilities have access to the most up-to-date assessment tools and guidance.

Here‚ you’ll find the complete RAI Manual in various versions‚ including v1;18.11 and v1.19.1‚ alongside corresponding Item Sets like v1.20.1v4‚ released to facilitate accurate data collection.

Zip files containing Part 1‚ Part 2‚ and Part 3 of the manual are often provided for comprehensive updates‚ alongside PDF versions of Errata sheets detailing specific revisions and clarifications.

These Errata documents‚ such as the one dated September 8‚ 2023‚ are crucial for understanding changes indicated by footers labeled “October 2023 (R)” on revised pages.

Regularly checking this section is vital for maintaining compliance and implementing the latest assessment protocols‚ as CMS frequently posts updates to reflect regulatory changes and best practices.

Understanding Item Set v1;20.1v4

Item Set v1.20.1v4 represents a significant update to the data collection components of the MDS RAI Manual‚ impacting how resident assessments are completed and submitted.

This version incorporates changes stemming from the August 7‚ 2023 Final Rule‚ requiring facilities to adapt their processes to align with the revised data elements and definitions.

Understanding the nuances of v1.20.1v4 is crucial for accurate reporting under the Skilled Nursing Facility Quality Reporting Program‚ driven by the IMPACT Act of 2014.

Facilities must carefully review the updated item set to identify any modifications to existing questions or the introduction of new data points‚ ensuring consistent application.

Accessing the MDS 3.0 Users Manual and related resources on the CMS website is essential for interpreting the changes and implementing them effectively within their assessment workflows.

Locating Updated Versions

Staying current with the latest MDS RAI Manual versions is paramount for compliance and accurate resident assessment. The primary source for updated materials is the CMS website‚ specifically within the Downloads section dedicated to the MDS 3.0.

Regularly check this section for releases like v1.19.1 (October 2024) and v1.18.11‚ alongside associated Errata documents detailing specific revisions (e.g.‚ September 8‚ 2023).

Draft versions‚ such as the v1.18.11 draft‚ provide previews of upcoming changes‚ allowing facilities to prepare proactively.

The MDS 3.0 Users Manual eManual and Survey Guide are also updated periodically‚ reflecting changes in regulations and assessment practices.

Subscribing to CMS updates and utilizing resources from organizations like CMS Compliance Group can further ensure timely access to the latest information.

Compliance & Operations

Long Term Care relies on MDS/RAI references (149.0018.50) for regulatory adherence‚ demanding meticulous documentation and utilizing the latest MDS 3.0 resources.

Long Term Care Compliance

Long Term Care Compliance is fundamentally linked to the accurate and consistent application of the MDS RAI Manual guidelines. Facilities must demonstrate adherence to regulations outlined within MDS/RAI References 149.0018.50‚ ensuring proper resident assessment and data submission.

Staying current with MDS 3.0 updates‚ including Version 1.19.1 and associated Item Sets‚ is paramount. The August 7‚ 2023 Final Rule significantly impacts compliance‚ necessitating thorough staff training and implementation of revised procedures.

Utilizing resources like the MDS 3.0 Users Manual and Survey Guide & Interpretive Guidelines is crucial for navigating the complexities of the assessment process. Accurate documentation‚ reflecting the resident’s current condition‚ is essential for avoiding penalties and maintaining quality care standards. Proactive monitoring of CMS updates and Errata releases is also vital for sustained compliance.

MDS/RAI References (149.0018.50)

MDS/RAI Reference 149.0018.50 serves as a critical cornerstone for long-term care facilities navigating the complexities of resident assessment. This reference directly links to the comprehensive guidance provided within the MDS RAI Manual‚ specifically Version 1.19.1 (October 2024) and its accompanying Item Sets.

Facilities rely on this reference to understand and implement the requirements outlined in the August 7‚ 2023 Final Rule‚ ensuring alignment with current regulations. Key resources include the MDS 3.0 Users Manual‚ offering detailed explanations of each assessment item‚ and the Survey Guide‚ providing interpretive guidelines for compliance.

Proper utilization of Chapter 2: Assessments for the RAI (October 2023) is essential‚ alongside consistent review of Errata and updates. Adherence to 149.0018.50 promotes accurate data submission and supports the Skilled Nursing Facility Quality Reporting Program driven by the IMPACT Act of 2014.

Importance of Accurate Documentation

Accurate documentation is paramount when utilizing the MDS RAI Manual‚ directly impacting resident care‚ facility compliance‚ and quality reporting. The MDS RAI Manual v1.18.11 (October 2023) and subsequent updates‚ like Version 1.19.1 (October 2024)‚ emphasize meticulous record-keeping.

Detailed and precise assessments‚ guided by Chapter 2 (October 2023)‚ are crucial for reflecting a resident’s true condition and care needs. This supports appropriate resource allocation and individualized care planning. Errors or omissions can lead to inaccurate coding‚ impacting Skilled Nursing Facility Quality Reporting Program data.

Compliance with 149.0018.50 and the August 7‚ 2023 Final Rule necessitates thorough documentation. Utilizing the MDS 3.0 Users Manual and Survey Guide ensures adherence to standards‚ minimizing risks during surveys and maximizing reimbursement accuracy.

hunter xcore sprinkler manual

Hunter X-Core Sprinkler Manual: A Comprehensive Guide

This manual details the Hunter X-Core controller, offering easy configuration for up to eight stations, alongside three programs and four start times.

It’s ideal for residential use, supporting lawn sprinklers, drip systems, and hybrid setups, with compatibility for the Solar Sync ET sensor.

The Hunter X-Core represents a significant advancement in residential irrigation control, designed for simplicity and efficiency. This controller is engineered to manage watering schedules for lawns, gardens, and landscapes with ease, offering a user-friendly experience for homeowners and professionals alike.

Featuring the capacity to manage up to eight independent stations, the X-Core allows for customized watering zones tailored to specific plant types and sun exposure. Its intuitive interface, combined with three distinct programs and four flexible start times per program, provides unparalleled control over your irrigation system.

Furthermore, the X-Core is readily compatible with Hunter’s innovative Solar Sync ET sensor, enabling automatic adjustments to watering durations based on real-time weather data. This feature promotes water conservation and ensures optimal plant health. The controller also supports Hunter remotes for convenient wireless operation, adding another layer of accessibility.

X-Core Components and Overview

The Hunter X-Core controller comprises several key components working in harmony. The central unit houses the processor, LCD screen, and control buttons for programming and operation. A robust, weather-resistant enclosure protects these internal elements from the elements, ensuring durability.

The front panel features a user-friendly interface, including a knob for manual adjustments and buttons for navigating the menu system. Terminals on the back of the unit facilitate wiring connections for valves, sensors, and power sources. The X-Core is available in models supporting 2, 4, 6, or 8 zones, catering to varying landscape sizes.

Essential functions are clearly indicated by symbols representing Seasonal Adjustment, Water Days, Start Times, System Off, Current Time/Day, Run Times, Active status, Sensor Bypass, and Run/Manual operation. These components collectively deliver a reliable and efficient irrigation management solution.

Understanding the X-Core Interface

The Hunter X-Core interface is designed for intuitive operation, despite its advanced capabilities. The LCD screen displays critical information, including the current time, date, active program, and zone status. Navigation relies on a combination of buttons and a rotary dial, allowing users to scroll through menus and adjust settings with ease.

Key icons represent various functions, such as program selection, start time adjustments, and seasonal adjustments. The “Active” indicator confirms which program is currently running. The “Sensor Bypass” function allows temporary override of sensor inputs. Understanding these symbols is crucial for efficient programming.

The manual-one station feature enables individual zone activation for testing or targeted watering. The interface also provides access to advanced settings, allowing customization of irrigation schedules to meet specific landscape needs. Familiarizing yourself with the layout streamlines the setup process.

Setting Up Your X-Core Controller

Proper installation is key; ensure secure wiring connections and a stable power source before proceeding with programming your new Hunter X-Core irrigation system.

Initial Setup and Wiring

Begin by mounting the X-Core controller in a sheltered location, protecting it from direct sunlight and rain. Carefully connect the wiring, ensuring each valve wire corresponds to its designated station terminal within the controller.

A common wire is crucial for all zones, connecting back to the controller’s common terminal. Verify proper grounding for safety and to prevent electrical interference. Connect the power source, typically 24VAC, following the controller’s wiring diagram.

Double-check all connections before powering on the unit to avoid short circuits or damage; If using a Solar Sync ET sensor, connect it to the designated sensor terminals, ensuring correct polarity; Refer to the wiring diagram included with your controller for specific instructions and terminal locations.

Connecting to a Solar Sync ET Sensor

The Solar Sync ET sensor automatically adjusts irrigation schedules based on real-time weather data, optimizing water usage; Locate the sensor terminals on the X-Core controller, typically labeled “Sensor” or “SEN”. Connect the sensor wires, observing correct polarity – usually indicated by color coding or markings.

Ensure a secure connection to prevent signal interference. Mount the Solar Sync ET sensor in an open area, receiving unobstructed sunlight throughout the day. Within the X-Core’s programming, enable the sensor function, specifying its type as “Solar Sync ET”.

The controller will now utilize the sensor’s data to dynamically adjust run times, reducing water waste and promoting healthy landscapes. Refer to the Solar Sync ET manual for detailed installation and configuration instructions.

Programming the X-Core: Basic Configuration

Begin by setting the current time and date on the X-Core controller, ensuring accurate scheduling. Navigate the interface using the control knob and buttons to access the “Date/Time” settings. Enter the correct values and save the changes.

Next, configure the system off mode to prevent watering during undesirable periods. Access the “System Off” function and set the desired start and end dates. Review the zone settings, verifying each zone is correctly assigned and labeled.

Familiarize yourself with the active settings, which control overall system operation. Understand the sensor bypass feature, allowing manual override of sensor signals. These basic configurations establish the foundation for creating customized watering schedules.

Programming Schedules

The X-Core allows for three independent programs, each with four customizable start times, enabling tailored watering plans for diverse landscape needs.

Creating and Naming Programs

To initiate a new watering schedule, navigate to the ‘Programs’ section within the X-Core interface. You can establish up to three distinct programs, allowing for differentiated irrigation strategies across your property – perhaps one for the lawn, another for flowerbeds, and a third for a vegetable garden.

Selecting ‘Add Program’ prompts you to assign a descriptive name to the schedule. This is crucial for easy identification and management, especially as your irrigation needs evolve seasonally. Consider names like ‘Front Lawn’, ‘Back Garden’, or ‘Drip System’.

The X-Core interface is designed for intuitive operation; simply use the control knob to scroll through the available characters and input your desired program name. Once named, the program is ready for configuration with water days, start times, and individual zone run times.

Setting Water Days and Start Times

Within each program, you’ll define the days of the week on which irrigation will occur. The X-Core offers flexible scheduling options, allowing you to select individual days, sequential days, or interval settings – like every other day. This ensures water conservation and caters to varying plant needs.

Next, establish the start times for each watering cycle. The X-Core supports up to four independent start times per program, enabling you to distribute water application throughout the day or night. Consider factors like evaporation rates and local water restrictions when setting these times.

Utilize the control knob to navigate the day selection and time input screens. Confirm your selections, and the X-Core will automatically activate the programmed zones according to your specified schedule.

Adjusting Run Times for Each Zone

Once programs and start times are set, individual zone run times require precise adjustment. Access the run time settings for each zone within a program using the control knob. Input the desired watering duration, measured in minutes, based on plant type, soil composition, and sprinkler head output.

Consider factors like sun exposure and slope when determining run times. Zones in full sun or on slopes will likely require shorter, more frequent cycles to prevent runoff. The X-Core allows for run times ranging from one minute to several hours, providing granular control.

Carefully monitor your landscape after initial programming and adjust run times accordingly. Observe plant health and soil moisture levels to optimize watering efficiency and promote a thriving garden.

Advanced Features and Settings

The X-Core offers seasonal adjustment, sensor bypass, and active settings for optimized control. These features enhance watering precision and efficiency, adapting to changing conditions.

Seasonal Adjustment Functionality

The Hunter X-Core’s seasonal adjustment feature is a powerful tool for optimizing water usage throughout the year. This allows you to globally increase or decrease run times across all programs, accommodating changes in weather patterns and plant water needs.

Instead of manually adjusting each zone, seasonal adjustment provides a percentage-based modification, simplifying the process. For example, during hotter summer months, you might increase run times by 25% to compensate for increased evaporation. Conversely, during cooler, wetter periods, you can reduce run times to prevent overwatering.

Accessing this feature through the X-Core interface is straightforward. The adjustment range typically spans from -25% to +25%, offering sufficient flexibility for most climates. Regularly utilizing seasonal adjustment promotes water conservation and maintains a healthy landscape.

Using the Sensor Bypass Feature

The Hunter X-Core’s sensor bypass feature allows you to temporarily override signals from connected sensors, such as rain or soil moisture sensors. This is crucial when you want to initiate a watering cycle despite sensor readings indicating otherwise – for example, after a period of sensor malfunction or for testing purposes.

Bypassing a sensor effectively “disconnects” it, allowing the controller to operate based on the programmed schedule. Accessing the bypass function is typically done through the controller’s interface, often involving a dedicated button or menu option labeled “Sensor Bypass” or similar.

Remember to deactivate the bypass once the specific need has passed, ensuring the sensor resumes its normal function of preventing unnecessary watering. Prolonged bypassing defeats the purpose of sensor integration and can lead to water waste.

Understanding and Utilizing Active Settings

The “Active” setting within the Hunter X-Core dictates whether a specific program is currently enabled and running. A program marked as “Active” will execute its scheduled watering cycles, while an “Inactive” program remains dormant, regardless of its programmed schedule. This allows for flexible control, enabling you to seasonally adjust watering based on plant needs or weather conditions.

To utilize Active settings effectively, navigate to the program selection within the controller’s interface. Toggle the “Active” status for each program as needed. For instance, you might deactivate a winter program focused on minimal watering and activate a summer program with increased run times.

Carefully manage Active programs to avoid unintended watering. Regularly review the Active status of each program, especially after making schedule adjustments, to ensure the controller operates as intended.

Troubleshooting Common Issues

Addressing malfunctions, programming errors, and sensor connectivity problems are crucial for maintaining optimal performance of your Hunter X-Core irrigation controller.

Addressing Controller Malfunctions

If your Hunter X-Core controller experiences a complete failure, begin by verifying the power supply. Ensure the transformer is correctly connected and delivering the appropriate voltage. A broken knob, as reported by some users, indicates a potential hardware issue requiring replacement. Check for any visible damage to the circuit board or internal components.

For unresponsive displays, try resetting the controller by briefly disconnecting the power. If the issue persists, a faulty display panel might necessitate professional repair or controller replacement. Remember to consult the Hunter X-Core manual online for detailed troubleshooting steps and diagrams. If you are uncomfortable with electrical work, always seek assistance from a qualified irrigation professional to avoid further damage or safety hazards.

Fixing Common Programming Errors

Incorrect start times or run durations are frequent issues. Double-check the programmed water days and start times within each of the three available programs. Ensure the ‘Run Times’ for each zone are accurately set according to your landscape’s needs. If a program isn’t running, verify it’s ‘Active’ within the controller settings.

Accidental program overwrites can occur; carefully review all program settings to confirm they align with your intended schedule. Utilize the ‘Manual-One Station’ feature to test individual zones and confirm correct operation. Refer to the Hunter X-Core manual for a detailed explanation of each setting. Remember to save any changes made to prevent data loss and ensure the controller functions as expected.

Dealing with Sensor Connectivity Problems

If your X-Core isn’t recognizing a sensor, first verify the wiring connections at both the controller and the sensor itself. Ensure the sensor is compatible with the X-Core – specifically, the Solar Sync ET sensor is designed for seamless integration. Utilize the ‘Sensor Bypass’ feature temporarily to determine if the sensor is preventing the system from running.

Check the sensor’s power supply if applicable, and confirm it’s transmitting a signal. Consult the sensor’s manual for troubleshooting steps. If issues persist, try resetting the controller and re-establishing the sensor connection. A faulty sensor or wiring may require replacement. Refer to Hunter’s support resources for detailed guidance and potential solutions.

X-Core Compatibility and Accessories

The X-Core works with Hunter remotes for wireless control and integrates with drip irrigation. It’s a versatile option, though differs from the Hunter X2.

Hunter Remote Compatibility

The Hunter X-Core controller boasts seamless compatibility with Hunter’s range of wireless remotes, offering convenient, off-site control of your irrigation system. These remotes allow for quick activation or deactivation of zones and programs without needing to physically interact with the controller itself.

This is particularly useful for situations where the controller is located in a hard-to-reach area, or for making adjustments based on unexpected weather changes. Hunter remotes provide a user-friendly interface, simplifying tasks like initiating manual watering cycles or temporarily pausing scheduled programs.

Ensure the remote is properly paired with the X-Core following the instructions in both the remote’s and controller’s manuals for optimal functionality. Compatibility extends to various Hunter remote models, enhancing the flexibility and convenience of your irrigation management.

Integration with Drip Irrigation Systems

The Hunter X-Core controller is exceptionally versatile, readily integrating with drip irrigation systems alongside traditional lawn sprinklers. This allows for customized watering schedules tailored to the specific needs of different plant types within your landscape. Drip irrigation delivers water directly to plant roots, minimizing water waste and promoting healthier growth.

When configuring the X-Core for drip zones, it’s crucial to adjust run times accordingly, as drip systems typically require longer watering durations than spray heads. Utilize the independent program functionality to create separate schedules for sprinkler and drip zones, optimizing water usage and plant health.

Proper valve selection is also key; ensure drip zones are connected to appropriately sized valves compatible with the X-Core’s output. This integration provides a comprehensive and efficient watering solution for diverse landscaping needs.

X-Core vs. Hunter X2 Comparison

The Hunter X-Core and X2 controllers both offer reliable irrigation management, but cater to different user preferences and needs. The X-Core is a robust, traditionally-operated controller, ideal for those seeking a straightforward, user-friendly experience without Wi-Fi connectivity. It excels in simplicity and ease of programming directly on the unit.

Conversely, the Hunter X2 boasts Wi-Fi capabilities, enabling remote control and monitoring via a smartphone app. This allows for adjustments from anywhere, alongside features like weather-based scheduling and detailed reporting. However, this added functionality comes at a higher price point.

Essentially, the X-Core is a cost-effective, dependable option for basic irrigation needs, while the X2 provides advanced control and convenience for tech-savvy users willing to invest in a connected system.

Resources and Support

Access the complete Hunter X-Core manual online at hunter.help/XCore, or locate local irrigation suppliers for assistance. Contact Hunter support for further help.

Accessing the Hunter X-Core Manual Online

Finding the Hunter X-Core manual online is straightforward, providing a readily available resource for users seeking detailed information about their irrigation controller. Hunter Industries maintains a comprehensive support website, hunter.help/XCore, where the complete manual can be downloaded in PDF format.

This online resource offers a searchable table of contents, allowing users to quickly locate specific sections related to installation, programming, troubleshooting, or advanced features. The digital format ensures you always have the latest version, including any updates or revisions made by Hunter.

Beyond the full manual, the Hunter website also features frequently asked questions (FAQs), instructional videos, and wiring diagrams, offering multiple avenues for support. Accessing these resources online eliminates the need to physically store a paper manual, making it convenient for on-the-go reference and problem-solving.

Finding Local Irrigation Suppliers

Locating a reputable local irrigation supplier is crucial for purchasing a Hunter X-Core controller, obtaining replacement parts, and receiving expert advice. Hunter Industries provides a “Find a Distributor” tool on their website, allowing you to search for authorized dealers in your area.

These suppliers typically stock a wide range of Hunter products, including the X-Core, Solar Sync ET sensors, and various sprinkler heads and components. They can assist with system design, offer installation guidance, and provide ongoing support for your irrigation needs.

Visiting a local supplier allows you to discuss your specific requirements with knowledgeable professionals and ensure you select the appropriate components for your landscape. Don’t hesitate to compare quotes from multiple suppliers to secure the best price and service.

Hunter Support Contact Information

For dedicated assistance with your Hunter X-Core controller, Hunter Industries offers multiple support channels. Their comprehensive website, hunter.help/XCore, provides access to the complete X-Core manual, frequently asked questions, and troubleshooting guides.

You can also reach Hunter’s customer support team directly via phone at 1-800-438-6837 during business hours (Mountain Standard Time). Email support is available through the contact form on their website, allowing you to submit detailed inquiries and receive personalized assistance.

Hunter Industries is committed to providing excellent customer service, ensuring you have the resources needed to successfully install, program, and maintain your X-Core irrigation system. Their support team can address programming questions, technical issues, and warranty claims.

keurig duo plus manual

Keurig K-Duo Plus Manual: Comprehensive Troubleshooting & Usage

This manual provides detailed guidance for resolving common issues with your Keurig K-Duo Plus. Frequent problems involve water flow,
unit shutdowns, and descaling, often stemming from clogs in tubing or the puncture needle.

The Keurig K-Duo Plus is a versatile coffee maker designed to brew both single-serve K-Cup pods and full carafes of coffee, offering flexibility to meet various needs. This model combines the convenience of Keurig’s single-cup brewing technology with the capacity for larger batches, making it ideal for both individual coffee drinkers and households. Understanding its features and potential issues is key to maximizing your brewing experience.

This manual aims to provide comprehensive troubleshooting and usage guidance, addressing common problems encountered by K-Duo Plus owners. Issues like water flow interruptions, unexpected shutdowns during the brew cycle, and difficulties with the descaling process are frequently reported. Often, these stem from blockages within the internal tubing or a clogged puncture needle in the K-Cup chamber. Recognizing these potential problems early can prevent frustration and ensure consistent coffee quality.

Understanding the K-Duo Plus Features

The Keurig K-Duo Plus boasts a multi-function design, allowing users to switch seamlessly between single-serve brewing using K-Cups and full carafe brewing for larger quantities. Key features include programmable settings for brew strength and temperature, ensuring a customized coffee experience. The large water reservoir minimizes refills, while the removable drip tray accommodates various mug sizes.

A crucial aspect of the K-Duo Plus is its pressure and water level sensing system, designed to prevent operation if clogs are detected. This safety feature can sometimes result in the unit shutting down during the brew cycle. The machine also incorporates a descaling indicator, prompting users to perform regular maintenance to remove mineral buildup. Familiarizing yourself with these features and their functions is essential for optimal performance and longevity of your Keurig K-Duo Plus.

Common Issues & Troubleshooting

Typical problems include water flow disruptions on both K-Cup and carafe sides, unexpected unit shutdowns during brewing, and difficulties with the descaling process.

Water Flow Problems: K-Cup Side

If your Keurig K-Duo Plus isn’t dispensing water on the K-Cup side, several factors could be at play. A primary suspect is a blockage within the internal tubing, preventing adequate water flow to the brew chamber. This can occur after descaling, even with a thorough flush, as residual descaling solution or mineral deposits might remain.

Another common cause is a clogged puncture needle. This needle pierces the K-Cup to allow water to flow through; if obstructed by coffee grounds or debris, it will severely restrict or halt water passage. Carefully inspect and clean the needle with a straightened paper clip, ensuring no obstructions remain.

Furthermore, ensure the K-Cup pod holder is correctly seated and that the K-Cup itself isn’t causing a blockage. If the issue persists after these checks, the unit may be shutting down due to a pressure or water level sensor issue, particularly after the heating cycle.

Water Flow Problems: Carafe Side

While the carafe side of your Keurig K-Duo Plus continues to function in some reported cases, diminished water flow can still occur. This often indicates a less severe blockage than issues affecting the K-Cup side, but requires attention. Check the carafe itself for any obstructions in the spout or lid, ensuring free-flowing access.

Inspect the filter basket within the carafe. A buildup of coffee grounds or mineral deposits can restrict water passage. Thoroughly clean the filter basket and ensure it’s properly seated. If descaling was recently performed, residual solution could be contributing to the reduced flow; a few brew cycles with fresh water may resolve this.

Although less common, a kink or obstruction in the tubing leading specifically to the carafe side could also be present. If the flow remains weak, consider contacting Keurig support for further assistance, as internal component issues may be present.

Unit Shutting Down During Brew Cycle

A frequent issue with the Keurig K-Duo Plus is the unit powering off mid-brew, particularly after the heating cycle initiates; This often signals a pressure or water level detection problem, frequently triggered by a clog. The machine’s safety mechanism halts operation to prevent damage.

First, suspect a blockage in the water lines. Kinks in the tubing or debris obstructing water flow can cause pressure drops, leading to shutdown. Similarly, a clogged puncture needle in the K-Cup chamber restricts water passage. Inspect and clear both.

Interestingly, the carafe side may continue to function even with K-Cup side failures. If this occurs, it suggests the clog is isolated to the single-serve system. If shutdowns persist after addressing potential clogs, consult the Keurig support website for error code diagnostics or warranty options.

Descaling Issues & Solutions

Regular descaling is crucial for maintaining your Keurig K-Duo Plus, preventing mineral buildup that restricts water flow and impacts brewing performance. However, descaling itself can sometimes cause issues, like blockages if not thoroughly flushed afterward.

If the K-Cup side stops working after descaling, despite the carafe side functioning normally, residual descaling solution or loosened mineral deposits are likely culprits. Ensure you’ve completed multiple full brewing cycles with fresh water to completely rinse the system.

Pouring the descaling solution directly into the pod holder and flushing it is a good initial step, but may not be sufficient. Continue flushing until the water runs completely clear. If problems persist, refer to the Keurig support website for specific descaling troubleshooting steps and recommended descaling solutions.

Detailed Troubleshooting Steps

This section offers precise instructions for diagnosing and fixing specific K-Duo Plus problems, including addressing a non-brewing K-Cup side, clearing clogs, and needle issues.

K-Cup Side Not Brewing After Descaling

Experiencing a non-functional K-Cup side post-descaling is a common issue with the Keurig K-Duo Plus. Despite the carafe side operating normally, the single-serve function may cease to brew, often halting shortly after initiating the cycle. This frequently indicates residual descaling solution or debris obstructing the water flow within the K-Cup brewing pathway;

Begin by thoroughly flushing the K-Cup pod holder, even if it appears clear. Pour water directly into the holder and run a brew cycle without a K-Cup to dislodge any remaining particles. Inspect the entrance and exit needles for coffee grounds or mineral buildup; a straightened paper clip can carefully clear these.

Crucially, check for kinks or obstructions in the tubing connecting the reservoir to the K-Cup brewing assembly. If issues persist, repeating the descaling process, followed by multiple flushing cycles, may resolve the blockage. Remember, continued failure warrants exploring warranty options.

Carafe Mode Working, K-Cup Mode Failing

A functioning carafe side coupled with a failing K-Cup side on your Keurig K-Duo Plus strongly suggests a localized blockage or issue within the single-serve brewing system. This scenario often arises after descaling, indicating potential debris obstructing the K-Cup pathway, but can also occur independently.

The key is that the shared components for carafe brewing remain unobstructed, while the K-Cup specific elements are compromised. Prioritize inspecting and clearing the K-Cup puncture needle and the surrounding area for coffee grounds or mineral deposits. Carefully flush the K-Cup pod holder, running several brew cycles with only water.

Since the carafe function works, you can continue brewing larger batches while addressing the K-Cup side. If these steps don’t resolve the issue, a more significant blockage within the tubing dedicated to the K-Cup side may be present, potentially requiring warranty support.

Addressing Clogged Puncture Needle

A clogged puncture needle is a frequent culprit when the K-Cup side of your Keurig K-Duo Plus malfunctions. This needle pierces the K-Cup to allow water flow, and accumulated coffee grounds or mineral scale can easily obstruct it, halting the brewing process.

To address this, carefully inspect the needle for visible debris. Never use anything abrasive that could damage it. A straightened paper clip can gently dislodge obstructions, but exercise extreme caution to avoid bending or breaking the needle.

After cleaning, run several brew cycles with only water to flush out any remaining particles. If the needle remains clogged, or if you’re uncomfortable attempting this yourself, contact Keurig support. A functioning puncture needle is crucial for proper K-Cup brewing, and persistent blockage indicates a deeper issue.

Clearing Blockages in Tubing

Blockages within the Keurig K-Duo Plus’s internal tubing can severely restrict water flow, particularly affecting the K-Cup brewing side. These obstructions often develop due to mineral buildup from hard water or accumulated coffee residue.

While direct access to the tubing is limited, thorough descaling is the primary method for clearing these blockages. Ensure you follow the Keurig’s descaling instructions precisely, using the recommended descaling solution. Multiple descaling cycles may be necessary for stubborn buildup.

If descaling doesn’t resolve the issue, carefully inspect visible tubing connections for kinks or obvious obstructions. Gently massage the tubing to dislodge potential blockages. Do not attempt to disassemble the unit beyond the manufacturer’s instructions, as this could void your warranty and cause further damage.

Maintenance & Cleaning

Regular cleaning extends the life of your Keurig K-Duo Plus. This includes descaling, cleaning the pod holder, carafe, filter, and exterior surfaces for optimal performance.

Regular Descaling Procedures

Descaling is crucial for maintaining your Keurig K-Duo Plus’s performance. Mineral buildup from water can clog internal components, impacting brew quality and potentially causing malfunctions. Keurig recommends descaling every three to six months, depending on water hardness. Use the Keurig Descaling Solution or a mixture of white vinegar and water.

Begin by emptying the water reservoir and adding the descaling solution. Run a full carafe brew cycle without a carafe or K-Cup. Repeat this process several times, then run multiple brew cycles with fresh water only to thoroughly rinse the system. After descaling, the K-Cup side may require additional flushing to remove any remaining solution, ensuring a clean taste in your coffee. Consistent descaling prevents issues like reduced water flow and unit shutdowns.

Cleaning the K-Cup Pod Holder

Regularly cleaning the K-Cup pod holder is essential for optimal brewing. Coffee grounds can accumulate in and around the entrance and exit needles, leading to clogs and affecting coffee flavor. After each use, remove the pod holder and discard the used K-Cup. Rinse the pod holder thoroughly with warm, soapy water.

Periodically, inspect the puncture needle at the top of the chamber. Use a straightened paper clip to gently clear any grounds or debris from both the entrance and exit needles. Be careful not to bend or damage the needle. A clogged needle can cause the unit to shut down during the brew cycle or result in weak coffee. Ensure the pod holder is completely dry before reassembling.

Cleaning the Carafe and Filter

Maintaining a clean carafe and filter is crucial for fresh-tasting coffee. After each use, promptly empty and rinse the carafe with warm, soapy water. The carafe is typically dishwasher safe (top rack recommended), but always check your user manual for specific instructions. Regularly inspect the carafe for any coffee stains or residue and address them with a gentle cleaning solution.

The filter basket should also be cleaned after each use. Remove the filter and discard the grounds. Rinse the filter basket thoroughly with warm water. For a deeper clean, occasionally wash the filter basket with mild dish soap. Ensure both the carafe and filter are completely dry before reassembling for the next brew. A clean carafe ensures optimal coffee flavor.

Exterior Cleaning & Care

Keeping the exterior of your Keurig K-Duo Plus clean enhances its appearance and longevity. Regularly wipe down the exterior surfaces with a soft, damp cloth. Avoid using abrasive cleaners, as they can damage the finish. For stubborn stains or spills, a mild dish soap solution can be used, followed by a clean water rinse and thorough drying.

Pay attention to the drip tray and surrounding areas, as these are prone to coffee splatters. Remove the drip tray and wash it with warm, soapy water. Ensure it is completely dry before replacing it. The control panel can be cleaned with a slightly damp cloth – avoid getting any liquid inside the buttons or display. Consistent exterior cleaning maintains a hygienic and attractive appliance.

Advanced Troubleshooting

For persistent issues, explore error codes and reset procedures. Repeated failures may necessitate warranty support; grounds in coffee indicate needle or filter problems.

Troubleshooting Error Codes

Keurig K-Duo Plus error codes provide valuable diagnostic information. While a comprehensive list is available on the official Keurig support website, some common codes include “Descale” indicating the need for descaling, and various pump-related errors signifying potential blockages or mechanical failures within the water system.

If you encounter an error code, first consult the Keurig website for a specific explanation and recommended solution. Often, a simple reset – unplugging the unit for several minutes – can clear temporary errors. However, persistent codes often point to deeper issues. Pump errors may require careful inspection of the tubing for kinks or obstructions, or potentially indicate a failing pump requiring professional repair or warranty replacement. Always document the error code before contacting support, as this will expedite the troubleshooting process.

Remember to always refer to the official Keurig documentation for the most accurate and up-to-date error code definitions and troubleshooting steps.

Dealing with Repeated Failures (Warranty)

Frequent breakdowns of your Keurig K-Duo Plus, especially within the warranty period, are understandably frustrating. Keurig typically offers a one-year limited warranty covering defects in materials and workmanship. If your unit fails multiple times within this timeframe, or shortly after, document each instance with dates, descriptions of the issue, and any troubleshooting steps taken.

Contact Keurig’s customer support directly, referencing your original purchase date and any previous repair or replacement requests. Be prepared to provide proof of purchase. If the unit continues to malfunction despite warranty service, explore options for a full replacement or refund. Keep detailed records of all communication with Keurig, including names, dates, and confirmation numbers.

Understanding your warranty rights and maintaining thorough documentation are crucial when dealing with repeated failures.

Grounds in Coffee: Causes & Solutions

Finding coffee grounds in your brewed cup is a common, yet undesirable, issue with Keurig K-Duo Plus machines. This typically indicates grounds accumulating within the entrance or exit needles of the K-Cup pod holder assembly. These needles are responsible for piercing and releasing water through the pod, and can become clogged over time.

To address this, carefully inspect and clean both needles. A straightened paper clip can be gently used to dislodge any trapped grounds – exercise caution to avoid damaging the needles. Regularly flushing the system with water and performing routine descaling can also prevent buildup. Ensure you’re using properly sealed K-Cups to minimize grounds escaping during brewing.

Consistent cleaning and proper pod usage are key to enjoying a grounds-free coffee experience.

Resetting the Keurig K-Duo Plus

When encountering persistent issues with your Keurig K-Duo Plus, a reset can often restore functionality. This process clears the machine’s memory and returns it to its factory settings, resolving software glitches or operational errors. Begin by ensuring the unit is completely powered off and unplugged from the electrical outlet for a minimum of 60 seconds.

After the waiting period, reconnect the power cord and turn the Keurig back on; You may need to re-run the initial setup process, including water hardness settings and time adjustments. A reset doesn’t erase permanent settings like water filter status, but it will require re-calibration of brewing preferences.

Consider a reset as a last resort after attempting other troubleshooting steps.

Resources & Support

For further assistance, visit the official Keurig support website. There, you’ll find FAQs, troubleshooting guides, and contact information for direct support.

Keurig Official Support Website

Accessing the Keurig official support website is your primary resource for comprehensive assistance with your K-Duo Plus. The website, typically found at Keurig.com/support, offers a wealth of self-help materials designed to address a wide spectrum of issues. You can navigate through detailed FAQs covering everything from basic operation to complex troubleshooting scenarios.

The support portal also features an extensive knowledge base, searchable by keyword or model number, allowing you to quickly pinpoint solutions relevant to your specific problem. Furthermore, Keurig provides downloadable user manuals, helpful videos demonstrating maintenance procedures, and guides for descaling your machine effectively.

If you are unable to resolve your issue through self-service options, the website offers multiple channels for contacting Keurig’s customer support team directly. These options often include live chat, email submission, and a toll-free phone number. Be prepared to have your model number and purchase date readily available when contacting support to expedite the assistance process.

samsung rf28hfedtsr manual

The Samsung RF28HFEDTSR manual is freely available online, providing essential guidance on installation, features, and troubleshooting. Reading it ensures optimal performance and safety.

1;1 Overview of the Samsung RF28HFEDTSR Refrigerator

The Samsung RF28HFEDTSR is a French Door Refrigerator with a 28 cu.ft. capacity, offering advanced features like Twin Cooling Plus technology for optimal humidity and temperature control. It includes an ice maker, water dispenser, and energy-efficient design, earning it an ENERGY STAR rating. The model is known for its sleek design and spacious interior, making it ideal for modern kitchens. The user manual provides detailed insights into its operation, maintenance, and troubleshooting, ensuring users can maximize its performance and longevity. This refrigerator is part of Samsung’s high-end lineup, designed to meet the needs of discerning homeowners seeking reliability and innovation.

1.2 Importance of Reading the Manual

Reading the Samsung RF28HFEDTSR manual is crucial for understanding its features, operation, and maintenance. It provides essential safety guidelines, warranty details, and troubleshooting tips. The manual ensures users can optimize performance, customize settings, and address common issues like ice maker malfunctions or temperature fluctuations. By following the guide, you can avoid costly repairs and extend the appliance’s lifespan. It also highlights energy-saving practices and maintenance schedules, ensuring efficient operation. Familiarizing yourself with the manual helps you make the most of your refrigerator’s advanced features, such as Twin Cooling Plus and the water dispenser, while preventing potential damage or misuse.

1.3 Where to Find the Manual Online

The Samsung RF28HFEDTSR manual can be easily downloaded from Samsung’s official support website or trusted appliance forums. Visit Samsung’s official site, navigate to the support section, and search for your model number to access the PDF manual. Additionally, platforms like ManualsLib or Scribd may host the document. Ensure you download from reputable sources to avoid unauthorized content. The manual is free and provides comprehensive guidance on installation, features, and troubleshooting. Accessing it online allows you to save or print it for future reference, ensuring you have all the information needed to operate and maintain your refrigerator effectively.

Installation and Setup

Ensure proper installation by measuring door clearance and space requirements. Follow the manual’s step-by-step guide for a smooth setup, ensuring all connections are secure and level.

2.1 Pre-Installation Requirements

Before installing the Samsung RF28HFEDTSR, measure the door opening, including baseboards and countertops, ensuring enough space for proper fit. Check for level floors and clear obstacles. Verify the refrigerator’s dimensions match the allocated space. Ensure proximity to a water supply for the ice maker and access to a nearby electrical outlet. Proper clearance for door swing is essential, considering walls or islands. Ensure the area is clear of debris and the floor is level to prevent uneven installation. These steps ensure a smooth and safe installation process, avoiding potential issues later.

2.2 Step-by-Step Installation Guide

Begin by carefully unpacking the refrigerator and inspecting for damage. Place it in the designated area, ensuring it’s level using the adjustable legs. Connect the water supply line to the refrigerator’s inlet valve, securing it tightly. Plug in the appliance and set the initial temperature settings. Allow the unit to cool for 24 hours before adding food. Install shelves and drawers as needed, ensuring proper alignment. Test the ice maker by running a few cycles. Finally, review the manual for any additional settings or features specific to your model. This ensures proper functionality and performance.

2.3 Post-Installation Checks

After installation, ensure the refrigerator is level and plumb for proper door alignment. Check that all electrical connections are secure and the water supply line is tightly connected. Verify the temperature settings are within the recommended range and test the ice maker and water dispenser functionality. Run a few cycles to ensure proper operation. Inspect the doors for a tight seal and check for any leaks or unusual noises. Finally, review the manual to confirm all features are activated and settings are customized to your preferences. This ensures optimal performance and addresses any potential issues early;

Key Features of the Samsung RF28HFEDTSR

The Samsung RF28HFEDTSR features Twin Cooling Plus Technology, an advanced ice maker, and a water dispenser. It also boasts energy efficiency and customizable settings for optimal performance.

3.1 Overview of Features

The Samsung RF28HFEDTSR boasts a range of innovative features, including Twin Cooling Plus Technology for precise temperature control. With a 28 cu.ft. capacity, it offers ample storage space. The refrigerator features an ice maker and water dispenser, providing fresh water and ice at your convenience. ENERGY STAR certification ensures energy efficiency, while customizable settings allow tailored performance. Additional features include advanced humidity control, spill-proof shelves, and a sleek design. These elements combine to deliver a convenient, efficient, and high-quality kitchen experience, making the RF28HFEDTSR a versatile choice for modern households.

3.2 Twin Cooling Plus Technology

The Twin Cooling Plus Technology in the Samsung RF28HFEDTSR ensures optimal humidity levels in both the refrigerator and freezer. This advanced system prevents cold air from mixing, maintaining freshness and preventing freezer burn. By separately controlling the cooling systems, it reduces odor transfer and keeps food at its best. The freezer temperature can be manually adjusted between 5°F and -8°F, offering flexibility for different storage needs. This feature enhances overall performance, preserving the quality of your groceries and extending their shelf life effectively.

3.3 Ice Maker and Water Dispenser

The Samsung RF28HFEDTSR features an advanced ice maker and water dispenser for convenience. The ice maker automatically produces ice, while the water dispenser provides fresh, filtered water. Regular maintenance, such as replacing the water filter, ensures optimal performance. If the ice maker ices over, it may need to be reset or defrosted. The water dispenser’s filter, like the WF294, should be replaced every 6 months. Proper care extends the lifespan of these features, ensuring consistent ice and water quality. These components enhance daily usability, making the refrigerator a practical choice for modern kitchens.

3.4 Energy Efficiency and Ratings

The Samsung RF28HFEDTSR is ENERGY STAR certified, ensuring energy efficiency and lower utility bills. Its advanced Twin Cooling Plus technology maintains optimal temperatures while minimizing energy consumption. With an annual energy consumption of approximately 748 kWh, this model is designed to be eco-friendly. The manual provides guidance on optimizing settings for energy efficiency, such as adjusting temperatures and using features wisely. This refrigerator balances performance and sustainability, making it a cost-effective and environmentally responsible choice for modern households. Its energy ratings and efficient design ensure long-term savings and reduced environmental impact.

Operating the Refrigerator

Learn to operate the Samsung RF28HFEDTSR with ease. Adjust temperature settings, use the ice maker, and maintain door and shelf organization for optimal performance and convenience.

4.1 Basic Operation and Controls

Mastering the basic operation of the Samsung RF28HFEDTSR begins with understanding its intuitive control panel. Located on the refrigerator’s exterior, it allows easy adjustment of temperature settings, ice maker activation, and access to advanced features. The display provides clear feedback on current settings, ensuring precise control. Familiarize yourself with the touch-sensitive buttons for seamless navigation. Regularly review the manual to optimize usage of features like the Twin Cooling Plus system and water dispenser. Proper operation ensures energy efficiency, consistent cooling, and prolonged appliance lifespan, making your daily routine more convenient and efficient.

4.2 Adjusting Temperature Settings

The Samsung RF28HFEDTSR allows precise temperature control, with the refrigerator adjustable between 32°F and 40°F and the freezer between 5°F and -8°F. Optimal settings are typically 37°F for the refrigerator and -2°F for the freezer. Use the control panel to adjust these settings, ensuring food stays fresh and energy is used efficiently. Regular checks and adjustments maintain consistent cooling, preventing temperature fluctuations that could affect food quality. Refer to the manual for detailed guidance on achieving the perfect balance for your needs, ensuring optimal performance, food preservation, and energy efficiency. This helps in maintaining your appliance’s efficiency and prolonging its lifespan.

4.3 Using the Ice Maker

The Samsung RF28HFEDTSR ice maker is designed for convenient ice production, capable of producing up to 2.5 pounds of ice daily. To use it, ensure the ice maker is turned on via the control panel. Check the water supply line is connected properly and the ice maker switch is activated. Regularly empty the ice bin to maintain efficiency. If the ice maker ices over, refer to diagnostic mode instructions in the manual. Proper usage ensures consistent ice production and prevents issues like icing or low output, keeping your ice supply fresh and readily available. Always follow manual guidelines for optimal performance.

4.4 Water Dispenser Maintenance

Regular maintenance of the water dispenser ensures clean and fresh water supply. Replace the water filter every 6 months or as indicated by the manual. Clean the dispenser nozzle and surrounding area with a soft cloth to prevent mineral buildup. Check for leaks in the water supply line and tighten connections if necessary. After cleaning, dry the dispenser thoroughly to prevent water spots. For optimal performance, refer to the manual for filter replacement instructions and compatible filter models. Proper maintenance enhances water quality and extends the lifespan of the dispenser. Always follow the manual’s guidelines for best results.

4.5 Door and Shelf Management

Proper door and shelf management ensures optimal storage and organization. Align doors to ensure proper sealing and energy efficiency. Adjust shelves to fit items of various sizes, maximizing space. Clean shelves regularly with a soft cloth and mild detergent to maintain hygiene. Check door seals for damage or wear, as this can affect cooling performance. For glass shelves, avoid extreme temperature changes to prevent cracking. Refer to the manual for guidance on adjusting shelf positions and door alignment. Regular maintenance ensures longevity and functionality of your Samsung RF28HFEDTSR refrigerator. Always follow the manual’s recommendations for best results. Proper care enhances overall performance.

Maintenance and Care

Regular cleaning, water filter replacement, and defrosting are essential. Follow the manual’s schedule to maintain efficiency and hygiene, ensuring optimal performance and longevity.

5.1 Cleaning the Refrigerator

Regular cleaning is crucial for maintaining hygiene and performance. Use a soft cloth and mild detergent to wipe down shelves and walls. Avoid harsh chemicals or abrasive cleaners, as they may damage surfaces. Remove all shelves and compartments and wash them with warm soapy water. Dry thoroughly before reinstalling. Clean the door gasket to ensure a tight seal. Check and clean the drain hose regularly to prevent clogs. For tough stains, mix baking soda and water for a gentle scrub. Always unplug the refrigerator before deep cleaning to ensure safety. Refer to the manual for specific cleaning recommendations.

5.2 Replacing the Water Filter

Replacing the water filter in your Samsung RF28HFEDTSR is essential for maintaining water quality. The recommended filter is part number WF294, available on Amazon. Replace every 6 months or 300 gallons. Turn off the water supply before starting. Locate the filter at the bottom rear or in the upper right corner, depending on your model. Twist and pull to remove the old filter, then insert the new one securely. Refer to the manual or video guides for precise steps. Proper installation ensures optimal performance and taste. Regular replacement prevents impurities and improves ice quality. Always use genuine Samsung filters for reliability.

5.3 Defrosting the Freezer

Defrosting the freezer of your Samsung RF28HFEDTSR is crucial for maintaining efficiency and preventing ice buildup. Start by turning off the freezer and removing all contents. Leave the door open to allow ice to melt naturally. Use a towel or tray to catch water. Avoid using harsh chemicals or abrasive tools, as they may damage surfaces. After defrosting, wipe down shelves and walls with a mild detergent. Ensure the freezer is completely dry before restarting. Regular defrosting helps maintain optimal performance and prevents frost from affecting food quality. Refer to the manual for detailed instructions.

5.4 Regular Maintenance Schedule

Regular maintenance ensures your Samsung RF28HFEDTSR operates efficiently. Check door seals every 1-2 months for tightness and cleanliness. Clean the condenser coils every 6 months to prevent dust buildup. Replace the water filter every 6-12 months to maintain water quality. Inspect and clean the drain pipe annually to prevent clogs. Check the freezer fan and refrigerator evaporator fan for dust and clean as needed. Schedule annual professional checks for internal components. Follow the manual’s guidelines for timing and procedures to keep your appliance in optimal condition and extend its lifespan.

Troubleshooting Common Issues

The Samsung RF28HFEDTSR manual helps resolve common issues like ice maker malfunctions, temperature fluctuations, and noise complaints. It provides step-by-step solutions for optimal appliance performance.

6.1 Identifying Common Problems

The Samsung RF28HFEDTSR manual helps users identify common issues such as ice maker malfunctions, temperature fluctuations, and unusual noises. It provides detailed diagnostic guidance to pinpoint problems quickly. By understanding error codes and symptoms, users can address issues before they escalate. The manual also covers troubleshooting for the water dispenser and cooling systems, ensuring optimal performance. Regular maintenance tips are included to prevent recurring problems. With clear instructions, users can resolve most issues independently, minimizing the need for professional assistance. This section is essential for maintaining the refrigerator’s efficiency and longevity.

6.2 Solving Ice Maker Issues

The Samsung RF28HFEDTSR manual provides solutions for common ice maker problems, such as icing over or low ice production. Check the water supply line for blockages or kinks. Ensure the water filter is clean or replaced as needed. If the ice maker is icing over, placing it in diagnostic mode can help resolve the issue. Resetting the ice maker by turning it off and on may also restore functionality. Regular maintenance, like cleaning the ice maker, prevents recurring issues. Refer to the manual for step-by-step instructions to ensure proper troubleshooting and maintenance.

6.3 Fixing Temperature Fluctuations

Temperature fluctuations in the Samsung RF28HFEDTSR can be addressed by checking and adjusting the temperature settings. Ensure the freezer temperature is set between 5°F and -8°F for optimal performance. If the temperature varies, reset the refrigerator by turning it off and on. Verify that doors seal properly to maintain consistent internal temperatures. Check for blocked vents or improper installation, as these can cause fluctuations. Refer to the manual for diagnostic mode instructions to identify and resolve issues. Regular maintenance, like cleaning vents, helps stabilize temperatures and ensures efficient operation. Always consult the manual for precise troubleshooting steps.

6.4 Addressing Noise Complaints

Noise complaints with the Samsung RF28HFEDTSR can often be resolved by ensuring the refrigerator is properly leveled and installed. Check for loose parts or uneven flooring, as these can cause vibrations and noise. Clean the condenser coils regularly to prevent dust buildup, which may lead to louder operation. If the noise persists, inspect the fan and compressor for obstructions. Ensure the refrigerator is placed on a sturdy, even surface away from walls to minimize resonance. Refer to the manual for specific troubleshooting steps or contact Samsung support for professional assistance if the issue remains unresolved.

6.5 Resetting the Refrigerator

To reset the Samsung RF28HFEDTSR refrigerator, press and hold the “Energy Saver” and “Power Freeze” buttons simultaneously for 3-5 seconds. This will reset the control panel and restore default settings. If issues persist, unplug the refrigerator from the power outlet, wait 5 minutes, and plug it back in. This process resets the compressor and internal systems. Note that resetting does not erase custom settings, so you may need to readjust temperature and features afterward. Always refer to the manual for specific reset procedures or contact Samsung support for advanced troubleshooting.

Warranty and Support

The Samsung RF28HFEDTSR is covered by a comprehensive warranty. For support, visit Samsung’s official website or contact their customer service. Authorized centers provide expert assistance for repairs.

7.1 Understanding the Warranty

The Samsung RF28HFEDTSR warranty provides coverage for parts and labor, ensuring protection against defects in materials and workmanship. The warranty period varies depending on the component, with the compressor typically covered for up to 10 years. Proper registration and adherence to maintenance guidelines are essential to maintain warranty validity. Any unauthorized modifications or misuse may void the warranty. For detailed terms and conditions, refer to the manual or visit Samsung’s official website. Understanding the warranty ensures you can address any issues promptly and effectively, leveraging Samsung’s support network for repairs and replacements.

7.2 Contacting Samsung Support

For assistance with your Samsung RF28HFEDTSR, contact Samsung Support through their official website or by phone. Visit https://www.samsung.com/support for live chat, troubleshooting guides, and repair requests. You can also call their customer service hotline, available 24/7, for immediate help. Additionally, authorized service centers can be located via the website. Ensure you have your model number and serial number ready for efficient support. Samsung’s dedicated team is equipped to address queries, from technical issues to maintenance concerns, ensuring your refrigerator operates at its best.

7.3 Finding Authorized Service Centers

To locate authorized service centers for your Samsung RF28HFEDTSR, visit the official Samsung Support website. Use the “Find a Service Center” tool, entering your location and model number (RF28HFEDTSR). This ensures you receive genuine parts and expert repairs. Additionally, trusted appliance forums and authorized retailers often list verified service centers. Always verify the center’s authorization to maintain your warranty and ensure reliable service. This step guarantees your refrigerator receives professional care, adhering to Samsung’s quality standards.

Safety Precautions

Always follow safety guidelines to prevent accidents and ensure efficient operation. Keep children away from moving parts, avoid overloaded shelves, and ensure proper electrical connections. Never use flammable products near the appliance and refer to the manual for specific safety instructions.

8.1 General Safety Guidelines

Always read the manual to understand safety precautions for the Samsung RF28HFEDTSR. Keep children away from moving parts and ensure shelves are not overloaded. Avoid using flammable products near the appliance. Proper installation and leveling are crucial to prevent accidents. Never unplug the refrigerator by pulling the cord; use the outlet. Regularly inspect for damage and ensure all doors close securely. Follow guidelines for electrical safety and avoid overloading circuits. Maintain a safe distance from heat sources and ensure proper ventilation. Regular maintenance checks can prevent potential hazards and ensure safe operation.

8.2 Electrical Safety Tips

Ensure the Samsung RF28HFEDTSR is plugged into a dedicated, grounded outlet rated for its power requirements. Avoid using extension cords or overloaded circuits. Never unplug the refrigerator by pulling the cord; always grasp the plug firmly. Keep the power cord away from water and heat sources. If the cord is damaged, stop using the appliance and contact a professional. Avoid exposing the refrigerator to excessive moisture or electrical surges. Regularly inspect the cord and outlet for wear or damage. Always follow the manual’s electrical guidelines to prevent hazards and ensure safe operation.

8.3 Child Safety Features

The Samsung RF28HFEDTSR includes child safety features to prevent accidental injuries or access. A child safety lock ensures that children cannot easily open the doors or adjust settings. Additionally, the door alarm alerts you if the doors are left open, preventing unauthorized access. Always supervise children near the refrigerator and teach them about appliance safety. These features help protect both your children and the appliance from potential damage. Regularly check that the safety lock is activated and ensure the doors close properly to maintain these protections.

Advanced Features and Settings

The Samsung RF28HFEDTSR manual details advanced features like diagnostic mode, demo mode, and customizable settings, enabling users to personalize and optimize their refrigerator’s performance and functionality.

9.1 Diagnostic Mode

Diagnostic mode on the Samsung RF28HFEDTSR allows users to identify and troubleshoot issues. Access by pressing specific buttons, it displays error codes and system status. This feature helps pinpoint malfunctions, guiding repairs. The manual provides step-by-step instructions for entering and using diagnostic mode effectively, ensuring optimal appliance performance and longevity. Regular use can prevent major breakdowns, keeping your refrigerator running smoothly. Refer to the manual for detailed guidance on diagnostic procedures and interpretations.

9.2 Demo Mode

Demo mode on the Samsung RF28HFEDTSR is a feature used in retail settings to showcase the refrigerator’s features without actual operation. When activated, it disables certain functions like the ice maker and alters display settings for demonstration purposes. To turn off demo mode, press and hold the Energy Saver and Ice Maker buttons simultaneously for 3 seconds. This will restore normal functionality. Ensure demo mode is deactivated for proper operation. The manual provides detailed steps to enable or disable this mode, ensuring your appliance performs as intended in your home environment.

9.3 Customizing Settings

The Samsung RF28HFEDTSR allows users to customize various settings for personalized performance. Through the control panel, you can adjust temperature settings, ice maker options, and energy-saving modes. The Energy Saver button helps reduce energy consumption, while the Ice Maker button enables or disables ice production. Additionally, the FlexZone feature can be tailored to specific cooling needs; Users can also set the Door Alarm duration and adjust display brightness. Refer to the manual for detailed instructions on configuring these settings to suit your preferences and optimize appliance functionality. Customization ensures efficient operation and enhanced user experience.

Downloading the Manual

The Samsung RF28HFEDTSR manual is available for free download as a PDF from Samsung’s official support website and trusted appliance forums, ensuring easy access to guidance.

10.1 Official Sources for the Manual

The Samsung RF28HFEDTSR manual can be downloaded directly from Samsung’s official support website. This ensures you receive the most accurate and up-to-date information. Additionally, trusted appliance forums and authorized service centers provide verified PDF versions of the manual. These official sources guarantee reliability and comprehensiveness, covering installation, troubleshooting, and maintenance. Always prefer these platforms to avoid unauthorized or outdated versions. The manual is freely available, offering detailed guidance on features, safety precautions, and warranty details. Downloading from official sources ensures you have all the necessary information to operate and maintain your refrigerator effectively.

10.2 Alternative Platforms for Download

Besides Samsung’s official website, the RF28HFEDTSR manual can be found on trusted appliance forums and platforms like ManualsLib or ManualsOnline. These sites often host user-contributed manuals and guides. Additionally, some third-party service providers offer downloadable versions, ensuring accessibility even if the official source is unavailable. Always verify the reliability of the platform to avoid outdated or incorrect versions. Supplementary guides and troubleshooting tips may also be available on these platforms, enhancing your understanding of the refrigerator’s features and maintenance requirements. Downloading from reputable sources ensures safety and accuracy.

p touch instruction manual

Welcome to the P-Touch Instruction Manual, your comprehensive guide to unlocking the full potential of your Brother P-Touch label maker. This manual is designed to help both new and experienced users navigate the features, settings, and maintenance of their device.

Whether you’re setting up your label maker for the first time or troubleshooting common issues, this manual provides clear instructions and tips to ensure optimal performance and efficiency.

1.1 Overview of the P-Touch Label Maker Series

The P-Touch label maker series by Brother offers a comprehensive range of models designed for various labeling needs. From handheld devices like the PT-H103W to desktop models such as the PT-1280, the series caters to both personal and professional use. These label makers are known for their durability, portability, and high-quality printing capabilities. With a variety of tape options, including TZ and TZe tapes, users can create durable, water-resistant labels for indoor and outdoor use. The series supports wireless connectivity, split-back tapes, and advanced customization features, making it a versatile tool for efficient labeling solutions.

1.2 Importance of Reading the Manual

Reading the P-Touch instruction manual is essential to fully utilize your label maker’s features and ensure optimal performance. It provides detailed guidance on setup, operation, and troubleshooting, helping you avoid common mistakes. The manual also highlights safety precautions, such as avoiding contact with the label maker while it’s cooling. By understanding the device’s capabilities and maintenance requirements, you can extend its lifespan and maximize efficiency. Additionally, the manual offers tips for efficient labeling and customization, enabling you to create professional-quality labels tailored to your needs.

Basic Setup and Installation

Setting up your P-Touch label maker is straightforward. Start by unboxing and physically setting up the device, then install the required software and drivers from Brother’s official website. Connecting the label maker to your computer ensures seamless operation. Follow the manual’s step-by-step guide for a hassle-free experience. Proper installation ensures optimal functionality and access to advanced features. Visit Brother’s official website for additional resources and support to complete the setup process efficiently.

2.1 Unboxing and Physical Setup

Begin by carefully unboxing your P-Touch label maker and inspecting the device for any damage. Remove all packaging materials and ensure all accessories, such as the power cord and tape cartridge, are included. Place the label maker on a flat, stable surface and plug in the power cord. Next, insert the tape cartridge by following the manual’s instructions for proper alignment. Finally, perform a test print to ensure the device is functioning correctly. Proper physical setup is essential for smooth operation and troubleshooting potential issues early on.

2.2 Installing P-Touch Software and Drivers

To ensure optimal functionality, visit the Brother official website to download and install the latest P-Touch software and drivers for your label maker. These tools enable advanced features, such as custom label design and wireless connectivity. Additionally, Brother offers specific utilities like driver language switching tools and network connection repair tools to enhance your experience. Downloading the correct software is essential for unlocking all the capabilities of your P-Touch device and ensuring compatibility with your computer or mobile device. This step is crucial for a seamless labeling experience.

2.3 Connecting the Label Maker to Your Computer

To connect your P-Touch label maker to your computer, use a USB cable or wireless connection. Insert the USB cable into both the label maker and your computer to establish a wired connection. For wireless models, enable Bluetooth or Wi-Fi on the device and pair it with your computer. Open the P-Touch software to confirm the connection. If using wireless, ensure both devices are on the same network. Follow on-screen instructions to complete the setup. This ensures seamless communication between your label maker and computer for printing labels efficiently.

Understanding the P-Touch Controls

Understand the P-Touch controls for easy navigation. The intuitive layout features directional buttons for menu scrolling and a print button for label creation and editing. The LCD display shows options for customization, ensuring efficient label design and printing.

3.1 Layout of the P-Touch Label Maker

The P-Touch label maker features a user-friendly design with a clear LCD display, a keypad for input, and a manual cutter for precise label trimming. The tape compartment is easily accessible, ensuring quick cartridge changes. The compact and lightweight build allows for portability, while the intuitive button layout enhances navigation. The power button and navigation keys are strategically placed for easy access, making it simple to create and print labels efficiently. This ergonomic design ensures a seamless labeling experience for both beginners and experienced users.

3.2 Navigating the LCD Display

The LCD display on the P-Touch label maker is designed for easy navigation, featuring a clear menu system and intuitive controls. Use the navigation keys to scroll through options, select settings, and preview labels before printing. The display shows text, symbols, and formatting options in real time, allowing you to review your design. Dedicated buttons simplify access to common functions like font size, bold text, and special characters. The display also provides status updates, such as low tape alerts, ensuring smooth operation and minimizing errors during the labeling process.

3.3 Basic Button Functions

The P-Touch label maker features a set of buttons designed for straightforward operation. The Power button turns the device on/off, while the Back button navigates to the previous menu. The OK button confirms selections and starts printing. The arrow keys (up, down, left, right) help scroll through menus, adjust text, and move the cursor. The Label button initiates printing, and the Cut button trims the label after printing. These buttons work together to streamline label creation, ensuring intuitive and efficient operation for users of all skill levels.

Loading and Using P-Touch Tapes

Insert the tape cartridge into the label maker, ensuring it clicks securely. Align the tape properly and close the compartment. The device automatically feeds the tape for printing.

4.1 Types of P-Touch Tapes Available

The P-Touch label maker supports a wide variety of tape cartridges, including standard, continuous-length, and specialty tapes. Sizes range from 4mm to 24mm widths, catering to different labeling needs. Tapes are available in durable laminated vinyl, flexible polyester, and paper materials. Specialty tapes include reflective, iron-on, and split-back options for easy peeling. Each tape type is designed for specific applications, such as indoor use, outdoor durability, or decorative purposes. Users can choose from multiple colors and finishes to suit their labeling requirements.

4.2 Installing the Tape Cartridge

To install a tape cartridge, open the tape compartment by lifting the lid or pressing the release button, depending on your P-Touch model. Remove any protective covering from the new cartridge. Align the cartridge with the guides inside the compartment and gently insert it until it clicks into place. Close the compartment securely to ensure proper alignment. The label maker will automatically detect the tape width and type. Ensure the cartridge is seated correctly for smooth operation and consistent label printing.

4.3 Adjusting Tape Length and Alignment

To ensure accurate label printing, adjust the tape length and alignment. Use the LCD screen to select the desired length by navigating with the arrow keys and confirming with the ‘OK’ button. For alignment, press the ‘Feed’ button to advance the tape, then use the arrow keys to align it properly. Ensure the tape is centered and evenly fed through the print head. Proper alignment prevents labeling errors and ensures crisp, clear text. Always preview the settings on the screen before printing to confirm accuracy.

Printing Basics

Master the fundamentals of printing with your P-Touch label maker. Start by creating your first label, checking tape and settings, and aligning properly for accurate results.

5.1 Creating Your First Label

Start by turning on your P-Touch label maker and ensuring the tape cartridge is properly installed. Open the P-Touch software on your computer or use the built-in keyboard if available. Type your desired text, select the font size, and adjust settings like bold or italic. Preview the label on the LCD screen or software to ensure accuracy. Print a test label to confirm alignment and quality. For standalone use, navigate the menu to input text directly on the device. Always save your label for future use and consult the manual for advanced options.

5.2 Printing Preview and Label Customization

Before printing, use the preview feature in the P-Touch software to review your label’s text, layout, and formatting. Customize font sizes, colors, and styles to match your needs. Add symbols or special characters for visual emphasis. Adjust margins and alignment to optimize label space. For standalone use, preview labels on the LCD screen and make adjustments using the control buttons. This step ensures your labels are accurate and professionally designed before printing, saving time and tape.

5.3 Using the Manual Cutter

The manual cutter allows you to trim labels to the desired length after printing. To use it, press and hold the cutter button until the blade engages. Gently pull the label to cut it cleanly. For safety, avoid touching the cutter blade. Regularly clean the cutter to maintain sharpness and prevent jams. This feature is ideal for precise cuts, especially when printing multiple labels at once. Always ensure the label maker is turned off before cleaning or servicing the cutter for added safety.

Advanced Printing Features

Explore advanced printing features like customizable fonts, sizes, and styles. Add symbols and special characters for unique labels. Use mirror printing for decorative or specialized needs efficiently.

6.1 Customizing Font Sizes and Styles

6.2 Adding Symbols and Special Characters

The P-Touch label maker allows you to enhance your labels by adding symbols and special characters. Access these options through the LCD display menu, where you can scroll through a variety of icons, such as copyright symbols, arrows, and logos. This feature is ideal for creating professional and visually appealing labels. Special characters can also be input using the keyboard or software. Preview your design on the screen before printing to ensure accuracy. This functionality makes your labels more engaging and tailored to your specific needs. Use it to add a personal touch or professional flair.

6.3 Using Split-Back Tape for Easy Peeling

The P-Touch label maker supports split-back tape, designed for easy peeling and application. To use this feature, ensure the split-back tape cartridge is properly installed. The split-back design allows labels to be peeled away from the backing paper effortlessly, making it ideal for hand application. After printing, simply separate the label from the backing by pulling it from the split edge. This feature is particularly useful for bulk labeling tasks, as it saves time and reduces waste. Always align the split-back tape correctly for optimal performance. Use this feature for efficient and convenient labeling. It streamlines your workflow and enhances productivity.

Maintenance and Troubleshooting

Regular maintenance ensures optimal performance. Clean the printer, check for dust, and replace worn parts. Troubleshoot common issues like misfeeds or ink errors using the manual.

7.1 Cleaning the P-Touch Label Maker

Regular cleaning prevents dust buildup and ensures smooth operation. Use a soft, dry cloth to wipe the exterior. For the print head, turn off the device, then gently clean with compressed air or a specialized cleaning tool. Avoid harsh chemicals or wet cloths, as they may damage components. Clean the cutter blade with a dry cloth to maintain sharpness. For internal parts, refer to the manual for approved cleaning methods. Regular maintenance ensures optimal performance and extends the lifespan of your label maker.

  • Use a soft cloth for exterior cleaning.
  • Clean the print head with compressed air or a specialized tool.
  • Avoid harsh chemicals or wet cloths.
  • Clean the cutter blade with a dry cloth.

Important: Always power off the device before cleaning internal components.

7.2 Common Issues and Solutions

Troubleshooting common issues ensures uninterrupted use of your P-Touch label maker. If labels are not printing, check the tape cartridge installation and ensure it is aligned. For jammed tapes, turn off the device, remove the cartridge, and gently pull out the jammed tape. If print quality is poor, clean the print head or replace the tape. Connectivity issues may require restarting the device or reinstalling drivers. Refer to the manual for specific error codes and solutions to resolve problems quickly and efficiently.

  • Jammed tape: Turn off the device and carefully remove the jammed tape.
  • Poor print quality: Clean the print head or replace the tape.
  • Connectivity issues: Restart the device or reinstall drivers.

Tip: Always refer to the manual for specific error codes and solutions.

7.3 Updating Firmware and Software

Regularly updating your P-Touch label maker’s firmware and software ensures optimal performance and access to new features. To update, connect your device to your computer via USB or network. Open the P-Touch software, navigate to the “Update” section, and follow on-screen instructions to download and install the latest version. Always use Brother’s official website for downloads to avoid compatibility issues. Updating enhances functionality, fixes bugs, and maintains device efficiency.

  • Connect the device to your computer via USB or network.
  • Open the P-Touch software and navigate to the “Update” section.
  • Download and install the latest firmware and software.

Tip: Regular updates ensure your label maker stays up-to-date with the latest features and improvements.

Integration with Software and Apps

The P-Touch label maker seamlessly integrates with Brother’s P-Touch software, mobile apps, and other productivity tools, offering enhanced functionality and streamlined workflows for label creation and management.

8.1 P-Touch Design & Print Software Overview

The P-Touch Design & Print software is a user-friendly tool designed to create and edit labels with ease. It offers a wide range of customization options, including various fonts, colors, and symbols. Users can design labels from scratch or use pre-made templates for efficiency. The software is compatible with all P-Touch label makers and allows for seamless integration with your computer. With its intuitive interface, it simplifies the labeling process, enabling you to produce professional-looking labels quickly and effortlessly. This software is essential for maximizing the potential of your P-Touch device.

8.2 Printing Labels via Mobile App

The P-Touch mobile app allows for convenient label printing directly from your smartphone or tablet. Compatible with both iOS and Android devices, the app enables wireless printing to your P-Touch label maker. Users can design labels, customize text, and send prints effortlessly. The app supports various label sizes and tape types, making it ideal for on-the-go use. It also allows for quick access to saved labels and seamless synchronization with your device. This feature enhances productivity and offers a modern, portable labeling solution for users who need flexibility.

8.3 Syncing Labels Across Devices

Syncing labels across devices ensures consistency and convenience, allowing users to access their designs from any connected device. The P-Touch software and app support cloud-based synchronization, enabling seamless sharing of labels between computers, smartphones, and tablets. To sync, ensure all devices are connected to the same account and have the latest software updates. This feature is particularly useful for teams or individuals working across multiple devices, ensuring all labels are up-to-date and easily accessible. Regular syncing also helps maintain backup copies of your designs for added security.

Tips for Efficient Labeling

Maximize productivity by organizing labels, saving frequently used designs, and using tape efficiently. These tips help streamline your workflow and improve labeling consistency across projects.

9.1 Organizing Labels for Different Projects

Organizing labels by project ensures efficiency and easy access. Use the P-Touch software to create folders for each project, naming them clearly for quick identification. For physical labels, store them in separate compartments or envelopes labeled by project name. This system prevents mix-ups and saves time when retrieving labels. Additionally, consider color-coding tapes or using unique label sizes for different projects to enhance visual organization. Regularly review and archive unused labels to maintain a clutter-free workspace.

9.2 Saving Frequently Used Labels

Saving frequently used labels streamlines your workflow and saves time. Use the P-Touch software to store labels in a designated folder or library. Assign clear, descriptive names to each label for easy retrieval. For recurring use, create templates with pre-set text, fonts, and layouts. Regularly back up your label library to prevent data loss. This feature is especially useful for businesses or individuals with consistent labeling needs, ensuring consistency and efficiency in their operations. Organized storage enhances productivity and reduces redundancy.

9.3 Best Practices for Tape Usage

To maximize the life of your P-Touch tapes, store them in a cool, dry place away from direct sunlight. Avoid touching the adhesive side to prevent oils from your skin causing premature wear. Always use the correct tape type for your intended application to ensure durability. Clean the cutter and print head regularly to remove residue. For optimal results, use the manual cutter correctly to avoid wasting tape. Proper handling and maintenance ensure consistent print quality and extend the life of your P-Touch supplies, reducing waste and saving costs over time.

Thank you for completing the P-Touch instruction manual! You now have the knowledge to efficiently use your label maker, from basic setups to advanced features. Regular maintenance and best practices will ensure optimal performance. If issues arise, refer to the troubleshooting section or contact support. Explore all the creative possibilities with your P-Touch and enjoy organized, professional labeling. Happy creating!

hotpoint range owners manual

Welcome to the Hotpoint Range Owner’s Manual! This guide provides essential information for safe and efficient operation, maintenance, and troubleshooting of your appliance. Discover features, settings, and care tips to maximize performance and longevity.

Overview of the Hotpoint Range

The Hotpoint Range is a versatile and reliable kitchen appliance designed to meet diverse cooking needs. Available in various models, such as the CID740B, CRA641DC, and KSC640XS, these ranges offer advanced features like self-cleaning ovens, multiple cooking modes, and energy-efficient designs. Whether you prefer gas or electric, Hotpoint ranges are built to deliver consistent performance and durability. With models like the RGB540SEP and RB525, users can enjoy precise temperature control, spacious interiors, and intuitive controls. These ranges are tailored to enhance your cooking experience, providing both functionality and style for modern kitchens.

Importance of Reading the Manual

Reading the Hotpoint Range Owner’s Manual is crucial for safe and effective appliance operation. It provides detailed instructions for installation, usage, and maintenance, ensuring optimal performance and longevity. The manual outlines essential safety precautions, such as proper ventilation and anti-tip devices, to prevent accidents. Additionally, it explains error codes, troubleshooting steps, and preventive care tips, helping you address issues before they escalate. By following the guidelines, you can maximize energy efficiency and make the most of advanced features like self-cleaning and multiple cooking modes. Referencing the manual also helps you understand warranty terms and customer support options, ensuring a smooth experience with your Hotpoint Range.

Safety Precautions and Guidelines

Always read the manual to ensure safe operation. Use anti-tip devices and follow California Safe Drinking Water Act notices for compliance and hazard prevention.

General Safety Information

To ensure safe operation, always read the manual thoroughly. Use anti-tip devices to prevent appliance tipping. Keep flammable materials away from the range. Never use the range for heating rooms or drying items. Proper ventilation is essential to avoid gas fumes. Children should be kept away from the appliance while in use. Always turn off the range when not in use and ensure all controls are in the “OFF” position. Regularly inspect and maintain the appliance to prevent malfunctions. Follow all safety guidelines to protect yourself and others from potential hazards.

  • Avoid placing towels or curtains near open flames.
  • Never leave cooking unattended.
  • Use oven mitts to handle hot surfaces.
  • Ensure proper installation by a qualified technician.

Critical safety notices are provided to ensure compliance and prevent accidents.

California Safe Drinking Water and Toxic Enforcement Act Notice

This notice is provided in compliance with the California Safe Drinking Water and Toxic Enforcement Act. It informs users about potential exposure to chemicals known to the state of California to cause cancer, birth defects, or reproductive harm. The manual includes necessary information to ensure safe use and minimize risks. Hotpoint appliances are designed to meet or exceed safety standards, and this notice is a precautionary measure. For more details, refer to the specific guidelines provided in the manual or contact Hotpoint customer service.

  • Always follow safety instructions carefully.
  • Be aware of potential chemical exposure risks.
  • Consult the manual for detailed safety information.

Installation and Setup

Proper installation ensures safe and efficient operation. Unpack carefully, position the range level, and connect gas or electrical supplies as specified. Secure the appliance and ensure stability.

Unpacking and Preparing the Range

Unpack your Hotpoint range carefully to avoid damage. Inspect for any shipping-related issues and ensure all components are included. Place the range in its designated area, ensuring the floor is level and sturdy. Install the anti-tip bracket to prevent accidental tipping. Before connecting utilities, double-check that the range is properly aligned and secured. If unsure about any step, consult a professional. Refer to the manual for specific unpacking and preparation instructions tailored to your model. Proper setup ensures safety and optimal performance from the start.

Electrical and Gas Connections

Ensure your Hotpoint range is connected by a licensed professional to avoid safety hazards. For electrical connections, verify the voltage and amperage requirements match your home’s setup. Use the correct gauge cable and avoid overloaded circuits. Gas connections must be made with approved piping and sealed properly to prevent leaks. Always follow local codes and manufacturer guidelines. Before energizing, double-check all connections for tightness and integrity. If unsure, consult a qualified technician. Proper connections are crucial for safe and efficient operation of your range. Refer to your manual for model-specific electrical and gas installation details.

Leveling and Securing the Range

Proper leveling and securing of your Hotpoint range are essential for safe and efficient operation. Place the range on a level surface using adjustable feet to ensure stability. Use a spirit level to verify even placement, adjusting the feet as needed. Secure the range to the floor or surrounding surfaces to prevent movement during use. Ensure anti-tip brackets are installed if required by your model. Check all connections after leveling to confirm they are tight and undamaged. Proper installation ensures optimal performance and safety. Refer to your manual for specific leveling and securing instructions tailored to your range model.

Operating the Hotpoint Range

Mastering your Hotpoint range’s operation ensures a seamless cooking experience. Familiarize yourself with the control panel, cooking modes, and safety features to optimize performance and efficiency.

Understanding the Control Panel

The control panel is the central hub for operating your Hotpoint range. It features a user-friendly interface with buttons, knobs, and a digital display. Knobs typically control burner heat, while buttons manage oven functions like temperature, timers, and cooking modes. The display provides real-time feedback, showing settings and status updates. Familiarize yourself with the layout to effortlessly navigate between cooking modes, adjust settings, and monitor progress. For specific models, refer to the manual for detailed button functions and customization options. Understanding the control panel ensures precise control and enhances your cooking experience. Always refer to the manual for model-specific guidance.

Cooking Modes and Functions

Your Hotpoint range offers a variety of cooking modes to suit different culinary needs. Conventional and convection cooking options allow for precise temperature control and even heat distribution. The grill function provides focused heat for crispy results, while slow cooking mode is ideal for tenderizing dishes over time. Additional features like fast preheating and multi-ring burners enhance versatility. Explore the range’s functions to optimize your cooking experience, whether searing, roasting, or baking. Refer to the manual for detailed instructions on activating and adjusting these modes to achieve perfect results every time.

Using the Oven and Surface Burners

Your Hotpoint range features a versatile oven and surface burners designed for efficient cooking. The oven offers precise temperature control, ideal for baking, roasting, and broiling. Surface burners provide adjustable heat, from low simmer to high sear. Use the right burner size for your cookware to optimize performance. Preheat the oven to the desired temperature before cooking for even results. Always place racks in the correct positions and avoid overcrowding. Regularly clean burners and drip pans to maintain efficiency. For safety, never leave cooking unattended and ensure the oven is cool before cleaning. Follow these tips to maximize your range’s performance and enjoy professional-quality results.

Maintenance and Care

Regular cleaning of burners, drip pans, and the oven is essential for optimal performance. Replace parts as needed and follow preventive maintenance tips to ensure longevity.

Cleaning the Range and Oven

Regular cleaning is crucial for maintaining your Hotpoint range’s performance and appearance. For the range, wipe down surfaces with a mild detergent and soft cloth after each use. Avoid using abrasive cleaners or bleach, as they may damage finishes. Clean burners and drip pans by soaking them in warm soapy water, then scrubbing gently. For the oven, use the self-cleaning feature or a gentle oven cleaner, following the manual’s instructions. Always allow surfaces to cool before cleaning to prevent burns or damage.

For tougher stains, mix baking soda and water to create a paste, applying it to affected areas. Let it sit before wiping clean. Clean racks in soapy water overnight for ease. Refer to your manual for model-specific cleaning recommendations to ensure optimal results and longevity of your appliance.

Replacing Parts and Filters

Regularly replacing parts and filters ensures your Hotpoint range operates efficiently and safely. Refer to your manual for model-specific instructions on replacing components like oven racks, burners, or water filters. Always use genuine Hotpoint parts to maintain performance and warranty validity. Before starting, unplug the range or disconnect power at the circuit breaker. For filters, such as water or air filters, replace them as recommended to prevent odor buildup and maintain clean airflow. Clean or replace drip pans and burner caps to avoid grease accumulation. Proper replacement and maintenance prolong the lifespan of your appliance and ensure optimal functionality.

Preventive Maintenance Tips

Regular preventive maintenance ensures your Hotpoint range performs optimally and lasts longer. Clean the burners, drip pans, and oven racks regularly to prevent grease buildup. Check and replace worn-out seals or gaskets to maintain proper heat retention. Inspect the range’s electrical connections and gas lines for leaks or damage. Run cleaning cycles periodically to remove food residue. Ensure proper ventilation by cleaning the exhaust fan and filters. Avoid using abrasive cleaners that might damage surfaces. Refer to your manual for specific maintenance schedules and recommendations tailored to your model. Consistent upkeep prevents unexpected repairs and keeps your appliance running safely and efficiently.

Troubleshooting Common Issues

This section helps identify and resolve common issues with your Hotpoint range, such as error codes, burner malfunction, or oven temperature problems. Refer to your manual or Hotpoint’s website for specific troubleshooting guides and solutions. If issues persist, contact professional service for assistance.

Identifying Error Codes

Hotpoint ranges may display error codes to indicate specific issues. These codes, such as “E1” or “F2,” are designed to help diagnose problems quickly. Refer to your owner’s manual for a comprehensive list of error codes and their meanings. If an error code appears, follow the manual’s instructions to resolve the issue. For example, some codes may require resetting the range, while others indicate a need for professional service. Visit the Hotpoint website or contact customer support for additional guidance. Always address error codes promptly to prevent further complications and ensure optimal performance of your appliance.

Resolving Common Problems

Your Hotpoint range may occasionally encounter issues, but most can be resolved with simple troubleshooting. If the oven isn’t heating, check the power supply and ensure the door is closed properly. For burners that won’t light, clean the burner caps and ensure the gas supply is turned on. Refer to the error code list in your manual for specific diagnoses. If issues persist, unplug the range or disconnect power before attempting further repairs. For complex problems, contact Hotpoint customer service or a certified technician. Regular maintenance, like cleaning filters and checking connections, can prevent many common issues and ensure optimal performance.

When to Contact Professional Service

If you encounter issues beyond basic troubleshooting, such as persistent error codes, gas leaks, or complex electrical problems, contact a certified professional. For warranty service or repairs requiring specialized tools, reach out to Hotpoint customer support. Always ensure repairs are performed by authorized technicians to maintain your appliance’s warranty and safety standards. Disconnect power before any service is performed. Consulting the manual or online resources can help determine when professional assistance is necessary to resolve the issue effectively and safely.

Energy Efficiency and Features

Hotpoint ranges offer advanced energy-saving features, including efficient burners and smart cooking modes. These technologies help reduce energy consumption while maintaining optimal performance for various cooking needs.

Energy-Saving Tips

To maximize energy efficiency, use lids on pots and pans to reduce heat loss. Preheat the oven only when necessary, and keep the door closed during cooking. Clean burners and vents regularly to ensure proper airflow. For electric ranges, use silicone mats to distribute heat evenly. When baking, turn off the oven 10-15 minutes before cooking time ends, as residual heat will finish the job. Avoid using the oven for small meals—opt for the stovetop instead. Always choose the right burner size for your cookware to minimize energy waste. Regularly cleaning the range and maintaining it ensures optimal performance and energy savings.

Advanced Features of Hotpoint Ranges

Hotpoint ranges offer cutting-edge features designed for modern cooking needs. Many models include self-cleaning ovens, which use high heat to burn food residue into ash. Some ranges feature multiple cooking zones, allowing for simultaneous cooking on different surfaces. Advanced temperature controls provide precise heat management, ensuring consistent results. Select models also offer smart integration, enabling users to monitor and control their range via smartphone apps. Energy-efficient designs minimize power consumption while maintaining performance. These innovations make Hotpoint ranges versatile, user-friendly, and ideal for home cooks seeking advanced functionality without compromising on quality or reliability.

Warranty and Support

Hotpoint ranges are backed by comprehensive warranties and dedicated customer support. Owners can access repair services, troubleshooting guides, and online resources for assistance with their appliances.

Understanding the Warranty

Your Hotpoint range is protected by a comprehensive warranty designed to ensure peace of mind. The warranty covers defective parts and labor for a specified period, typically one year for parts and labor, and up to five years for major components. Coverage begins from the date of purchase and applies to the original owner, though it may extend to succeeding owners under certain conditions. For valid claims, Hotpoint provides authorized service technicians to perform repairs; Extended service agreements are also available for additional protection beyond the standard warranty period. Always refer to your manual for detailed terms and conditions.

Contacting Hotpoint Customer Service

For assistance with your Hotpoint range, contact customer service via phone at 0344 822 … or through the official website. Live chat and email options are also available for convenience. The Hotpoint support team is ready to address inquiries, provide troubleshooting guidance, and help with warranty claims. Visit the Hotpoint website for a comprehensive list of contact options, FAQs, and downloadable resources. Representatives are available 24/7 to ensure your questions are resolved promptly and efficiently. GE Appliances also supports Hotpoint products, offering additional resources and expert advice.

Additional Resources

Access additional resources, including downloadable manuals, FAQs, and technical specifications, to enhance your Hotpoint range experience. Visit the official website for comprehensive support options;

Downloading the Manual Online

Downloading the Hotpoint range owner’s manual online is a convenient and efficient way to access essential information. Visit the official Hotpoint website or trusted platforms like ManualsLib or OvenManuals.com to find your specific model. Enter the product name or model number in the search bar to quickly locate the manual. Once found, download the PDF version for easy reference. The manual includes detailed instructions for installation, operation, and troubleshooting. Additionally, you’ll find energy-saving tips, maintenance advice, and warranty details. Ensure you have the latest version for accurate and up-to-date guidance. This resource is invaluable for optimizing your appliance’s performance and longevity.

Accessing Technical Specifications

Accessing technical specifications for your Hotpoint range is straightforward and essential for understanding its capabilities and requirements. These specifications, often found in the manual, include details about dimensions, power consumption, compatible parts, and operational parameters. Visit the official Hotpoint website or trusted platforms like ManualsLib or OvenManuals.com to view or download the technical data sheet for your specific model. This information ensures compatibility with other appliances, helps in planning installations, and provides insights into energy efficiency and performance. Referencing these specifications is crucial for troubleshooting and maintaining your range effectively, ensuring optimal use and longevity of your appliance.

Frequently Asked Questions

Frequently asked questions about your Hotpoint range are addressed in the manual to ensure smooth operation and troubleshooting. Common inquiries include error code meanings, cleaning methods, and maintenance tips. Users often ask about optimizing cooking performance and resolving issues like uneven heating or ignition problems. The manual also provides guidance on replacing parts and understanding energy efficiency features. For additional support, visit Hotpoint’s official website or platforms like ManualsLib for downloadable resources. Referencing these FAQs can help you resolve common concerns quickly, ensuring your range operates efficiently and safely, and extending its lifespan through proper care and maintenance.

Final Tips for Optimal Use

For optimal performance, regularly clean your Hotpoint range and use recommended cookware. Always follow safety guidelines to prevent accidents; Check for error codes and refer to the manual for troubleshooting. Maintain proper ventilation during cooking to ensure efficiency. Familiarize yourself with the control panel for precise temperature control. Schedule routine maintenance to extend the appliance’s lifespan. Store the manual for quick reference and ensure all users understand its contents. By following these tips, you’ll enjoy reliable and efficient cooking with your Hotpoint range for years to come.

Hotpoint’s Commitment to Quality

Hotpoint is dedicated to delivering superior quality and reliability in every appliance. With over a century of experience, the brand prioritizes innovation, durability, and customer satisfaction. Each range is designed to meet high standards, ensuring consistent performance and safety. Hotpoint’s commitment to quality extends beyond manufacturing, with comprehensive support services, including detailed manuals and responsive customer care. By investing in a Hotpoint range, you benefit from a legacy of trust and excellence, backed by resources to help you make the most of your appliance. This dedication ensures your cooking experience is both enjoyable and worry-free for years to come.

yamaha ql5 manual

Welcome to the Yamaha QL5 manual, your comprehensive guide to mastering the QL5 digital mixing console. This manual covers setup, features, troubleshooting, and maintenance, ensuring optimal use for both novice and experienced users.

1.1 Overview of the Yamaha QL5 Console

The Yamaha QL5 is a powerful digital mixing console designed for live sound, installation, and broadcast applications. It features a intuitive touchscreen interface, Dante network integration, and premium effects. With 64 mixing channels, 32 buses, and expandable I/O options, the QL5 offers flexibility for complex audio setups. Its compact design and robust feature set make it ideal for professional engineers seeking high-quality sound and efficient workflow. The console supports user-defined keys and custom fader layouts, enabling personalized operation. Rated highly by professionals, the QL5 combines advanced technology with Yamaha’s renowned reliability, making it a top choice for modern audio production needs.

1.2 Importance of the Manual for Optimal Use

The Yamaha QL5 manual is essential for unlocking the console’s full potential. It provides detailed guidance on setup, operation, and troubleshooting, ensuring users can navigate advanced features confidently. By understanding the manual, engineers can optimize their workflow, customize settings, and resolve common issues efficiently. This resource is crucial for both beginners and experienced professionals, offering insights into Dante integration, effects processing, and network configurations. Regular updates and maintenance tips are also included, ensuring long-term performance and reliability. Reading the manual thoroughly is the first step toward mastering the QL5 and achieving professional-grade sound quality in various applications.

1.3 Target Audience for the Manual

The Yamaha QL5 manual is designed for sound engineers, audio technicians, and musicians aiming to maximize the console’s capabilities. It caters to professionals in live sound, installation, and production, offering in-depth guidance for advanced users. Additionally, the manual is beneficial for new users seeking to understand the console’s features and operation. It also serves as a resource for educators and students in audio engineering programs. Whether you’re setting up a venue, configuring a network, or troubleshooting issues, this manual provides essential information for all users, ensuring efficient and effective use of the Yamaha QL5 digital mixing console.

Installation and Setup

The Yamaha QL5 installation involves unpacking, initial inspection, and connecting to your audio system. Follow the manual for proper network and Dante setup, ensuring optimal performance.

2.1 Unpacking and Initial Inspection

Begin by carefully unpacking the Yamaha QL5 console, ensuring all components are included and undamaged. Inspect the unit for any signs of physical damage or tampering. Verify the inclusion of essential accessories like the power cord and manuals. Before powering on, check for any visible wear or dents. Familiarize yourself with the console’s layout, including faders, buttons, and the touchscreen interface. Ensure all cables and connectors are securely stored and ready for connection. This step ensures a smooth setup process and prevents potential issues during installation. Always handle the console with care to maintain its functionality and longevity.

2.2 Connecting the QL5 to Your System

Connect the Yamaha QL5 to your audio system by first powering it on and ensuring all cables are securely attached. Use XLR or TRS connectors for analog inputs and outputs. For digital integration, utilize Dante networking, configuring settings via the touchscreen interface. Assign output channels to your sound system, ensuring proper routing for mains, subgroups, and auxiliaries. Test all connections to confirm signal flow and adjust levels as needed for optimal performance. Proper setup ensures seamless integration with your existing audio infrastructure, whether for live sound, installations, or studio use.

2.3 Updating Firmware and Software

Updating the Yamaha QL5’s firmware and software is essential for maintaining optimal performance and security. Start by visiting Yamaha’s official website to download the latest firmware and software versions specific to your QL5. Ensure you only download updates from Yamaha’s official support page to avoid malicious software. Once downloaded, transfer the firmware to a USB drive and insert it into the QL5. Use the touchscreen interface to navigate to the update section and follow the on-screen instructions. For software like QL Editor or Dante integration, download updates from Yamaha and install them on your computer or directly on the console if applicable. Before updating, back up your settings to prevent data loss. Ensure the console is powered reliably and avoid interruptions during the update. After updating, test the console to confirm all features are functioning correctly. Always check release notes for compatibility and improvements, and verify that updates align with your system’s requirements. Regular updates will keep your QL5 running smoothly and securely, ensuring you have access to the latest features and enhancements.

Features and Functionalities

The Yamaha QL5 offers advanced digital mixing capabilities, including Dante networking, extensive channel and bus configurations, and powerful effects processing. Its intuitive interface enhances workflow efficiency and creativity.

3.1 Digital Mixing Console Overview

The Yamaha QL5 is a state-of-the-art digital mixing console designed for live sound, broadcasting, and installed applications. It features 64 input channels, 32 mix buses, and 8 DCA groups, offering exceptional flexibility. With a Dante audio networking option, the QL5 seamlessly integrates into complex sound systems. Its intuitive user interface, including a touchscreen and physical faders, provides quick access to key functions. The console supports scene recall, customizable user settings, and a comprehensive effects suite, making it a versatile tool for professional audio engineers seeking precision and reliability in various mixing environments.

3.2 Channel and Bus Configuration Options

The Yamaha QL5 offers flexible channel and bus configuration options, enabling tailored setups for diverse mixing scenarios. With 64 input channels and 32 mix buses, users can customize routing, grouping, and signal flow. Channel linking allows for stereo or multi-channel configurations, while aux buses support complex monitor and effects routing. The console also features 8 DCA groups for streamlined control over multiple channels. Additionally, the QL5 supports custom fader layouts and scene recall, ensuring efficient workflow management. These configuration options empower engineers to adapt the console to specific applications, from live performances to installations, with precision and ease.

3.3 Effects and Processing Capabilities

The Yamaha QL5 is equipped with a wide range of effects and processing tools, enhancing your mixing experience. It includes high-quality reverb, delay, compression, and EQ effects, all accessible via the console’s intuitive interface. Users can assign effects to individual channels, aux buses, or the main output, allowing for precise control over sound shaping. The QL5 also supports custom effect libraries and advanced processing algorithms, ensuring versatility for various mixing needs. With its robust processing capabilities, the QL5 delivers professional-grade audio quality, making it ideal for live sound, installations, and studio applications.

3.4 Networking and Dante Integration

The Yamaha QL5 supports advanced networking capabilities, including Dante integration, enabling seamless audio distribution over IP networks. Dante allows for flexible and scalable audio routing, with low latency and high reliability. This feature is particularly useful in live sound applications, where multiple devices need to be connected across long distances. The QL5’s Dante integration simplifies setup and configuration, ensuring efficient communication between devices. With Dante, users can easily manage large-scale audio systems, making it an essential tool for professional installations and live performances.

3.5 User Interface and Navigation

The Yamaha QL5 features an intuitive user interface designed for effortless navigation. The large touchscreen display allows quick access to key functions, while the faders and encoders provide tactile control. Customizable home screens let users prioritize frequently used features, enhancing workflow efficiency. The interface supports multi-touch gestures, enabling seamless adjustments and navigation. This design ensures that even complex operations remain straightforward, making the QL5 accessible to both seasoned professionals and newcomers. The interface’s logical layout minimizes learning curves, allowing users to focus on their creative process without unnecessary distractions.

User Manual Specifics

The Yamaha QL5 manual is structured to guide users through setup, operation, and troubleshooting. It includes detailed diagrams, troubleshooting tips, and step-by-step instructions for optimal use.

4.1 Structure and Organization of the Manual

The Yamaha QL5 manual is meticulously organized into clear sections, ensuring easy navigation. It begins with an introduction, followed by installation and setup guides, detailed feature explanations, troubleshooting tips, and advanced configurations. Each section is logically structured to cater to both novice and experienced users, with cross-references and a comprehensive index for quick access. The manual’s clear hierarchy and detailed content ensure that users can efficiently find the information they need, making it an indispensable resource for mastering the QL5 console.

4.2 How to Use the Reference Manual Effectively

To maximize the benefits of the Yamaha QL5 reference manual, familiarize yourself with its structure and utilize its search functionality. Use the table of contents or index to quickly locate specific topics. For digital versions, leverage the search function to find keywords or phrases, ensuring efficient navigation. Cross-references and hyperlinks within the manual provide additional resources for deeper understanding. Regularly update your manual to access the latest features and corrections. By exploring tutorials and troubleshooting sections, you can resolve issues swiftly and enhance your operational skills. This systematic approach ensures you make the most of the manual’s comprehensive guidance.

4.3 Searching for Specific Terms and Topics

To efficiently find information in the Yamaha QL5 manual, use the search function available in your viewing software. For example, in Adobe Reader, type your keyword in the search bar to locate relevant sections quickly. The manual is structured to allow easy navigation, with hyperlinks and a detailed index. When searching, use specific terms like “quantize” or “vocal” to narrow down results. This feature is particularly useful for troubleshooting or learning advanced functionalities. Regularly exploring the manual ensures you uncover all its resources, making it an indispensable tool for mastering the QL5 console.

Troubleshooting Common Issues

Troubleshooting common issues with the Yamaha QL5 involves resolving audio output problems, fixing connectivity and network issues, and addressing firmware and software glitches. Refer to the manual for detailed solutions.

5.1 Resolving Audio Output Problems

Resolving audio output issues on the Yamaha QL5 involves checking channel settings, ensuring proper gain levels, and verifying mute status. If no audio is present, confirm that channels are not muted and that faders are up. Check the main output settings and ensure the correct output ports are selected. For digital connections, verify Dante or network configurations. Restarting the console or rebooting connected devices can often resolve glitches. If issues persist, consult the manual for advanced troubleshooting steps or update firmware to the latest version for optimal performance.

5.2 Fixing Connectivity and Network Issues

Resolve connectivity and network issues on the Yamaha QL5 by first verifying physical connections and ensuring all cables are securely plugged in. Restart the console and connected devices to refresh the system. Check Dante settings for proper configuration and ensure network switches are functioning correctly. If issues persist, update the firmware to the latest version. Consult the manual for detailed network troubleshooting guides or contact Yamaha support for advanced assistance. Regularly updating software and ensuring stable network conditions will help prevent connectivity problems and maintain seamless operation.

5.3 Addressing Firmware and Software Glitches

Address firmware and software glitches on the Yamaha QL5 by first ensuring the console is updated to the latest version. Restart the device to apply changes and resolve temporary issues. If problems persist, reset the console to factory settings while backing up important configurations. Use the QL Editor software to remotely diagnose and fix firmware-related issues. For unresolved glitches, contact Yamaha support with detailed error logs for tailored assistance. Regular updates and proper system maintenance are crucial for preventing software instability and ensuring optimal performance.

Advanced Configurations

Customize the Yamaha QL5 for specific applications, configure user privileges, and optimize Dante settings for seamless network integration, ensuring tailored performance for professional audio environments and workflows.

6.1 Customizing the Console for Specific Applications

The Yamaha QL5 offers extensive customization options to suit various applications. Channel linking simplifies setup for stereo or group inputs, while Aux routing and scene management enable tailored configurations for live sound, theater, or installations. Users can assign faders to specific channels, customize user privileges, and adapt the console’s layout to their workflow. The QL5’s flexibility allows it to excel in diverse environments, from small venues to large-scale productions, ensuring optimal performance and efficiency. By leveraging these features, professionals can create a console setup that perfectly aligns with their operational needs and enhances their creative process.

6.2 Setting Up User Privileges and Security

Enhance security and control on the Yamaha QL5 by setting up user privileges. The console allows administrators to create custom user profiles with varying levels of access, ensuring that sensitive settings remain protected. Password protection prevents unauthorized changes, while assignable permissions enable tailored control for different operators. This feature is particularly useful in multi-user environments, such as theaters or shared live sound setups. By configuring user privileges, you can maintain system integrity and ensure seamless collaboration without compromising security, making the QL5 adaptable to professional and secure workflows across various applications.

6.3 Configuring Dante and Network Settings

Configuring Dante and network settings on the Yamaha QL5 ensures seamless audio networking. Assign IP addresses, subnet masks, and gateways to integrate the console with other Dante-enabled devices. Use the QL5’s interface to set up Dante I/O, audio routes, and latency compensation. Ensure proper network configuration for optimal performance. Test the setup by pinging devices and verifying audio transmission. Refer to Yamaha’s resources for troubleshooting common issues. This setup enables reliable, high-quality audio distribution across your network, essential for professional applications.

Maintenance and Support

Regularly update firmware, clean the console, and monitor system health for optimal performance. Contact Yamaha support for technical assistance and access additional resources for troubleshooting and maintenance.

7.1 Cleaning and Caring for the Console

Proper maintenance ensures the Yamaha QL5’s longevity. Regularly clean the console with a soft, dry cloth to remove dust and fingerprints. Avoid harsh chemicals or abrasive materials that could damage the surface or screens. For stubborn marks, lightly dampen the cloth with water, but ensure no moisture enters the console. Avoid exposure to direct sunlight or extreme temperatures. Store the QL5 in a protective case when not in use. Refer to the manual for detailed cleaning instructions to preserve performance and aesthetics. Regular care prevents dust buildup and maintains optimal functionality.

7.2 Regular Software Updates and Maintenance

Regular software updates are crucial for optimal performance of the Yamaha QL5. Always check the Yamaha website for the latest firmware and software versions. Download and install updates using a USB drive to ensure compatibility and functionality. Follow the manual’s step-by-step guide to avoid errors during the update process. After updating, verify that all features operate correctly. Schedule periodic maintenance to clean internal components and ensure proper cooling. Backup your settings before performing updates to prevent data loss. Keeping your QL5 up-to-date ensures access to new features, bug fixes, and enhanced security.

7.3 Contacting Yamaha Support and Resources

For assistance with your Yamaha QL5, visit the official Yamaha website for comprehensive support resources. Access downloadable manuals, firmware updates, and troubleshooting guides. Contact Yamaha’s customer support team directly for personalized help via phone, email, or live chat. Explore Yamaha’s community forums to connect with other QL5 users and professionals, sharing tips and solutions. Additionally, Yamaha offersRepair services and authorized service centers for hardware issues. Stay updated with Yamaha’s newsletter and product notifications to maximize your QL5 experience. Utilize Yamaha’s extensive online library for tutorials, FAQs, and user-generated content to enhance your workflow and troubleshooting skills.

Additional Resources

Explore Yamaha’s official website for downloadable guides, tutorials, and FAQs. Join Yamaha’s community forums for user discussions and expert advice. Access online tutorials and video guides for in-depth learning.

8.1 Online Tutorials and Video Guides

Yamaha offers extensive online resources, including video tutorials and guides, to help users master the QL5. These tutorials cover topics like channel basics, touchscreen navigation, and advanced routing. Available on Yamaha’s official website and YouTube, they provide step-by-step instructions for optimizing console performance. Whether you’re a novice or an experienced user, these resources ensure a smooth learning curve. Videos also include troubleshooting tips and firmware update guides. Access these tools to enhance your mixing skills and explore the QL5’s full potential. Regular updates keep content relevant, ensuring you stay informed about new features and best practices.

8;2 Yamaha QL5 Community and Forums

The Yamaha QL5 community and forums provide a vibrant space for users to connect, share experiences, and solve challenges. Active discussions cover troubleshooting, tips, and best practices for optimizing console performance. Experienced engineers and enthusiasts alike contribute insights, fostering a collaborative environment. These forums are ideal for seeking advice on specific setups or resolving unique issues. Yamaha also engages directly with users, offering official support and updates. By participating in these communities, you gain access to a wealth of knowledge and resources, ensuring you maximize the QL5’s capabilities. This collective expertise is invaluable for mastering the console.

8.3 Downloadable Guides and Documentation

Yamaha offers a variety of downloadable guides and documentation to support QL5 users. These resources include detailed manuals, quick-start guides, and reference materials. Available on Yamaha’s official website, these documents provide in-depth information on setup, operation, and troubleshooting. Users can also access firmware updates, ensuring their console stays up-to-date. Additionally, supplementary guides cover advanced features like Dante integration and custom configurations. These downloadable resources are designed to help users maximize the QL5’s potential, offering clear instructions and expert insights. Whether you’re a novice or an experienced engineer, these guides are essential for mastering the console efficiently.

With this manual, you’ve successfully navigated the Yamaha QL5’s intuitive design and powerful features. Continue exploring and mastering its capabilities to achieve professional audio excellence.

9.1 Summary of Key Features and Benefits

The Yamaha QL5 offers a comprehensive suite of tools designed to enhance mixing workflows. With features like customizable channel layouts, advanced Dante integration, and robust effects processing, the QL5 ensures flexibility and efficiency. Its intuitive interface and high-quality sound reproduction make it ideal for live sound applications. Users benefit from seamless networking capabilities, allowing for scalable audio systems. Additionally, regular firmware updates ensure the console stays up-to-date with the latest technologies. These features collectively provide a reliable and professional mixing experience, making the QL5 a valuable asset for sound engineers and technicians.

9.2 Final Tips for Mastering the Yamaha QL5

To fully master the Yamaha QL5, explore its advanced features like Dante integration and effects processing. Regularly update firmware for the latest improvements and utilize the manual for troubleshooting. Practice organizing shows with scenes and cues for smooth operation. Familiarize yourself with channel linking and user privileges to customize workflows. Experiment with the touchscreen interface for intuitive control. Join Yamaha QL5 forums for tips and solutions. Always back up settings and configurations. Finally, stay updated with Yamaha’s resources and tutorials to maximize the console’s potential and ensure professional-grade performances.