When a Chevy Silverado manual 4WD refuses to engage‚ drivers face sudden loss of traction and safety. Understanding the basic mechanics‚ common triggers‚ and early warning signs helps prevent costly damage and ensures reliable off‑road performance; Check fluid levels‚ inspect the transfer case‚ listen for noises!

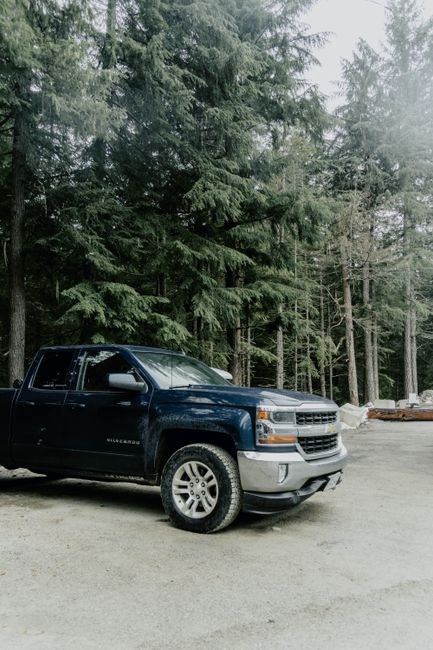
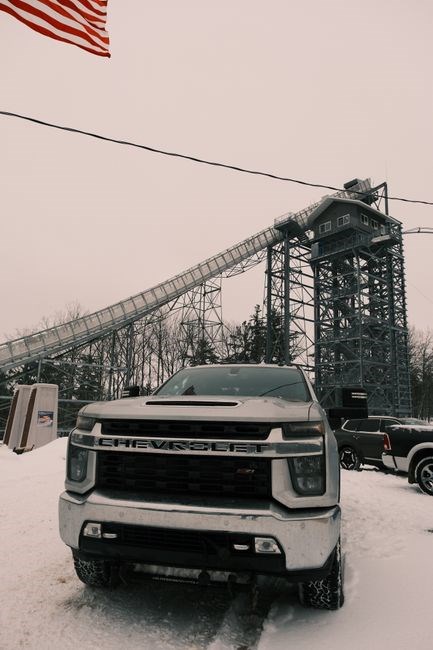
Chevy Silverado 4WD Overview
The Chevy Silverado’s 4WD system is engineered to deliver power to all four wheels‚ enhancing traction on uneven terrain. In a manual transmission model‚ the driver must engage the 4WD by selecting the appropriate gear and shifting the transfer case lever or using the electronic selector. The system relies on a combination of a transfer case‚ differential locks‚ and a transfer clutch to distribute torque.
Engagement typically occurs when the driver steps on the clutch‚ selects 4WD mode‚ and moves the transfer case selector. The transfer case then engages the front and rear differentials‚ allowing torque to be split between the axles. Proper operation requires clean fluid‚ correct pressure‚ and a functioning clutch. When any component fails—such as a seized transfer case‚ worn clutch plates‚ or low fluid—the system may refuse to engage‚ leading to loss of traction and potential damage.
The transfer case itself houses a clutch pack that must be lubricated and free of wear. Over time‚ metal shavings can build up‚ causing the clutch to stick or fail to disengage. Additionally‚ the transfer case selector lever may become jammed if the linkage is bent or the selector shaft is damaged. Electrical engagement systems‚ common in newer models‚ rely on a solenoid that must receive proper voltage; a faulty solenoid or a blown fuse can prevent the 4WD from engaging even though the mechanical components are sound. Regular diagnostics‚ such as checking the transfer case fluid level and inspecting the selector linkage‚ can catch these issues before they lead to a complete failure.
Check regularly‚ always!!

Symptoms of 4WD Engagement Failure
When a Chevy Silverado’s manual 4WD refuses to engage‚ several tell‑tale signs appear. The most obvious is a lack of power delivery to the front wheels after selecting 4WD; the vehicle will still drive in 2WD mode but the front axle will not receive torque. Drivers often notice a sudden loss of traction on slick or uneven surfaces‚ causing the front wheels to spin or skid even though the engine is running normally.
Another symptom is a distinct grinding or whining noise coming from the transfer case when the selector lever is moved; If the clutch pack inside the transfer case is worn or seized‚ the lever will feel stiff‚ and the noise will persist until the system is forced into 4WD. In some cases‚ the selector may click into place but the indicator light on the dash will remain off‚ signaling that the system did not lock.
Electrical engagement models may show a flashing or amber warning light‚ indicating a fault in the solenoid or wiring. The driver may also experience a delay between selecting 4WD and the system engaging‚ or the vehicle may return to 2WD automatically after a short period. A common visual cue is a visible gap or misalignment in the transfer case linkage‚ which can prevent proper engagement.
Drivers may also notice that the clutch pedal feels unusually hard or spongy when attempting to engage 4WD‚ indicating a possible hydraulic issue. Additionally‚ the vehicle may emit a metallic clunk when the transfer case attempts to lock‚ and the front wheels may vibrate excessively. In extreme cases‚ the 4WD selector may become stuck in the neutral position‚ preventing any engagement. These subtle cues can be missed if the driver is not attentive‚ so regular checks are essential.
A low transfer case fluid level or a burnt oil smell often accompanies engagement failure. Inspect the fluid reservoir for a metallic taste‚ and check for leaks around the transfer case housing. If the fluid is dirty or contaminated‚ it can cause the clutch pack to stick‚ preventing proper engagement. Replacing the fluid and filter is a simple yet effective troubleshooting step before more invasive repairs are considered.
Root Causes
Common root causes include worn transfer case clutch packs‚ low or contaminated fluid‚ broken linkage‚ failed solenoids‚ or damaged shift forks. Electrical faults in the 4WD selector or hydraulic pressure loss also prevent engagement. Also‚ a damaged transfer case seal causes engagement failure
Transmission Issues
When the 4WD system fails‚ the vehicle may lose traction on terrain‚ leading to loss of control. A approach is to use a to read transmission codes‚ which can reveal solenoid failures or warnings. Inspecting the transmission fluid for a burnt smell or metallic particles can also indicate damage.
Transfer Case Issues
When a Chevy Silverado’s drive refuses to engage‚ transfer case is often the culprit. Common symptoms include clicking noise when attempting to shift‚ a grinding sensation‚ or a inability to lock rear wheels. Root causes can be traced to a few key components:
- Solenoid Failure: The electronic solenoid that actuates the transfer case may lose power or become stuck‚ preventing the gear selector from moving into 4WD
- Shift Linkage Problems: A bent or disconnected linkage can mis‑position the selector‚ causing the case to remain in 2WD
- Fluid Issues: Low or contaminated transfer case fluid reduces hydraulic pressure‚ making it difficult to engage the 4WD gear
- Lock‑up Mechanism Failure: The lock‑up clutch that locks the front and rear axles together may seize‚ preventing full engagement
Diagnosing these problems involves inspecting the selector lever‚ checking fluid levels and condition‚ and testing the solenoid with a multimeter. If the solenoid is‚ it be replaced; if the fluid is‚ a drain and refill is required. In many cases‚ a mechanic will disassemble the case to inspect gears and bearings. This typically requires a thorough inspection and possible replacement of the affected components. Diagnosis often involves a scan a inspection of the transfer case

Diagnostic Checklist
Check the 4WD selector lever‚ verify fluid level and condition‚ test the solenoid voltage‚ inspect the shift linkage for damage‚ listen for abnormal noises‚ and confirm the transfer case engages under load. Check for whining noise‚ and ensure the transfer case’s gears mesh smoothly.!Look for fluid leaks at the case.
Visual Inspection Steps
Begin by parking the vehicle on a level surface and engaging the parking brake. Inspect the 4WD selector lever for any visible damage or misalignment; a bent lever often indicates a linkage problem. Next‚ locate the transfer case fluid reservoir and check the fluid level with the dipstick. The fluid should be at the “Full” mark and exhibit a clear‚ reddish hue. A dark or contaminated fluid signals a need for a change.
Examine the transfer case cover for leaks or cracks. Small pinhole leaks are common and can be sealed with a high‑temperature gasket sealant. Inspect the drive shafts for bent or broken splines‚ as these can prevent the transfer case from engaging. Look for any debris or foreign objects that may have entered the case during off‑road use.
Check the shift linkage for wear or broken components. The linkage should move smoothly when the selector lever is moved; any resistance or wobble may indicate a broken rod or damaged bushings. Verify that the linkage is properly connected to the transfer case input shaft.
Inspect the transfer case’s internal components by removing the cover and looking for worn gears or a damaged gear mesh. A worn gear tooth can cause the case to stall when engaged. Use a flashlight to spot any missing or chipped teeth. If the gears appear smooth and intact‚ the issue may lie in the hydraulic system.
Finally‚ look for any electrical connections near the transfer case. Loose or corroded connectors can prevent the solenoid from receiving proper voltage. Ensure all plugs are seated firmly and that the wiring harness shows no signs of fraying or damage. If any of these signs are present‚ address them to avoid further damage!
Common Repair Solutions
Replace the transfer case solenoid‚ reseat the shift linkage‚ and refill fluid. If gears are worn‚ swap the transfer case. Tighten all bolts‚ clean electrical contacts‚ and test the 4WD selector. Small fixes often restore engagement quickly. Check seal integrity replace if needed.
Parts to Replace
When the 4‑wheel drive on a Chevy Silverado fails to engage‚ the culprit is often a worn or damaged component within the transfer case or its associated systems. Below is a concise list of the most common parts that require replacement‚ along with a brief explanation of why each is critical to proper 4‑WD operation.
- Transfer Case Gear – Internal gears split torque between front and rear axles‚ causing uneven wear and grinding noise. Replacing restores smooth power delivery.
- Transfer Case Solenoid – This electrically‑driven valve controls fluid flow to the front differential. A faulty solenoid can prevent the 4‑WD selector from activating‚ so swapping it often resolves the issue.
- Shift Linkage & Lever – The mechanical linkage that moves the transfer case’s selector may become bent or corroded. Replacing the linkage or lever ensures the selector moves correctly.
- Transfer Case Seals & Gaskets – Leaks can cause low fluid pressure and improper engagement. New seals and gaskets maintain the necessary hydraulic environment.
- Front Differential Gear Set – If the front differential’s gears are worn‚ the transfer case may still engage but fail to transmit torque effectively. Replacing the front differential gear set restores full 4‑WD capability.
- Clutch Assembly (if manual) – A worn clutch can prevent the transfer case from engaging due to insufficient torque transfer. Replacing the clutch plate and pressure plate restores engagement.
- Transfer Case Housing (internal) – Cracks or dents in the housing can compromise the internal fluid dynamics. Rebuilding or replacing the housing restores proper function.
- Electrical Wiring & Connectors – Corroded or damaged wiring to the 4‑WD selector can cause intermittent engagement. Replacing affected wiring or connectors ensures reliable operation.
Before ordering parts‚ it is advisable to perform a diagnostic check to confirm the exact failure point. Replacing the correct component not only fixes the immediate problem but also extends the life of the entire drivetrain. All parts ensure 4WD

When to Seek Professional Help
While many 4‑wheel‑drive problems can be diagnosed with a simple fluid check or a quick visual inspection‚ certain situations demand the expertise of a certified technician. If you encounter any of the following scenarios‚ it is best to call a shop that specializes in Dodge/Chrysler powertrains. Even if you have a basic toolbox‚ the complexity of modern transfer cases means that many repairs require specialized knowledge.
- Persistent engagement failure after basic troubleshooting. If the transfer case selector still won’t lock‚ the issue may lie deep inside the case or in the hydraulic system.
- Unusual noises such as grinding‚ whining‚ or clunking when shifting. These sounds often indicate internal gear damage that requires disassembly.
- Fluid leaks around the transfer case or front differential. Leaks can compromise pressure and may have caused internal wear.
- Electrical faults in the 4‑WD selector or solenoid. Diagnosing wiring or sensor problems is best performed with diagnostic equipment.
- Unexpected loss of traction or sudden loss of power during off‑road use. This could signal a catastrophic failure that needs immediate attention.
Professional help is also essential when you need to rebuild or replace the transfer case‚ as the process involves specialized tools and knowledge of the case’s internal geometry. Additionally‚ a qualified mechanic can verify that the correct fluid type and level are maintained‚ and that the entire drivetrain is balanced after repairs. Ultimately‚ trusting a professional ensures that the Silverado’s 4‑wheel drive system remains reliable and safe for years to come. Regular inspections can catch early signs of wear before they become serious.

Maintenance and Prevention Tips
Check transfer‑case fluid‚ replace every 30k miles‚ inspect for leaks‚ keep selector clean‚ use proper gears‚ and perform visual checks. Rebuild every 80k miles if you tow or off‑road. Seal cover to keep dust out. Use a gauge to confirm pressure after fluid changes. Keep seals intact. Regularly.
Check seals for cracks and inspect drive shafts for wear. Cracks can cause very problems later.
Fluid Check and Change Frequency
Maintaining proper transfer‑case fluid is essential for a Chevy Silverado manual 4WD to engage reliably. Inspect the fluid level every 5‚000 miles or at each service interval. Use a dipstick or a dedicated transfer‑case gauge; the fluid should sit within the marked range. If the level is low‚ top it up with the manufacturer‑specified gear oil‚ typically a 75W‑90 or 80W‑90 synthetic blend‚ depending on your model year.
Check the fluid’s color and consistency. Fresh fluid is amber and slightly translucent; dark‚ gritty‚ or oily sludge indicates contamination or overheating. If the fluid appears dirty or contains metal shavings‚ replace it immediately. A dirty transfer case can clog the internal gears and prevent the 4WD selector from engaging.
Change the fluid every 30‚000 miles or 24 months‚ whichever comes first. For heavy‑towing or off‑road use‚ consider a more aggressive schedule: every 15‚000 miles or 12 months. Always drain the old fluid completely and flush the case with a clean solvent before refilling. After a fluid change‚ reset the transfer‑case reset switch or follow the manufacturer’s procedure to ensure the system recognizes the new fluid level.
Keep a log of all fluid checks and changes. Document the mileage‚ fluid condition‚ and any symptoms observed. This record helps diagnose recurring issues and proves maintenance compliance during inspections or resale.
Cover sealed very to prevent now!dusta‚ inspect operation during checks. A clean transfer case life. Check the transfer case for leaks oil.

After diagnosing a Chevy Silverado manual 4WD that refuses to engage‚ the most common fixes involve checking fluid levels‚ inspecting the transfer case‚ and ensuring the 4WD selector mechanism is free of debris or wear. If the fluid is clean and at the correct level‚ yet the system still stalls‚ the issue may lie deeper within the transfer case’s internal gears or the selector linkage. In many cases‚ a simple fluid change and a thorough visual inspection will restore full functionality‚ but persistent problems often require a more detailed teardown or professional service. Regular maintenance—such as scheduled fluid changes‚ timely replacement of worn parts‚ and routine checks of the transfer case’s mechanical components—helps prevent sudden failure and extends the lifespan of the drivetrain. By staying vigilant and addressing minor symptoms early‚ owners can keep their Silverado’s 4WD engaging reliably‚ ensuring both safety and performance on every drive.
Owners should also monitor the transfer case’s temperature gauge during heavy use; an overheating case often signals internal wear. If the gauge climbs above 200°F‚ stop driving and inspect for leaks or worn seals. Additionally‚ keep the transfer case shifter cable free of rust and ensure the selector lever moves smoothly. A quick test is to engage 4WD while the vehicle is stationary and listen for a distinct click; absence of this click confirms a mechanical fault that requires repair. Remember to replace the transfer case filter every 30‚000 miles to keep the gears and prevent sludge.!!