
Overview of the Lil Sew and Sew Instruction Manual
The Lil Sew and Sew instruction manual is a crucial resource for operating and maintaining the LSS-505 sewing machine, providing clear, step-by-step guidance for setup, troubleshooting, and project execution, ensuring a seamless sewing experience for both beginners and experienced users.
The Lil Sew and Sew LSS-505 is a compact, multi-purpose sewing machine designed for versatility and ease of use. It features a free arm, making it ideal for sewing cuffs, sleeves, and other hard-to-reach areas. The machine is lightweight and portable, perfect for crafting, repairs, and small projects. With its electric power supply and user-friendly interface, the LSS-505 caters to both beginners and experienced sewists. Its durable construction ensures long-lasting performance, while its intuitive controls simplify the sewing process. This model is a popular choice for those seeking a reliable, space-saving sewing solution.
1.2 Importance of the Instruction Manual for Operation and Maintenance
The instruction manual for the Lil Sew and Sew machine is an essential guide for optimal operation and maintenance. It provides detailed instructions for setting up the machine, threading, and troubleshooting common issues. By following the manual, users can ensure proper usage, maintain performance, and extend the machine’s lifespan. The manual also covers safety precautions, stitch selection, and care tips, making it indispensable for both beginners and experienced users. Regularly referencing the manual helps prevent errors and ensures seamless sewing experiences. It serves as a comprehensive resource for understanding the machine’s features and achieving professional-quality results.
Setting Up and Threading the Lil Sew and Sew Machine
Setting up and threading the Lil Sew and Sew machine requires careful attention to the manual’s guidance to ensure proper operation and prevent issues. This process is straightforward when following the provided step-by-step instructions.
2.1 Step-by-Step Guide to Threading the Machine
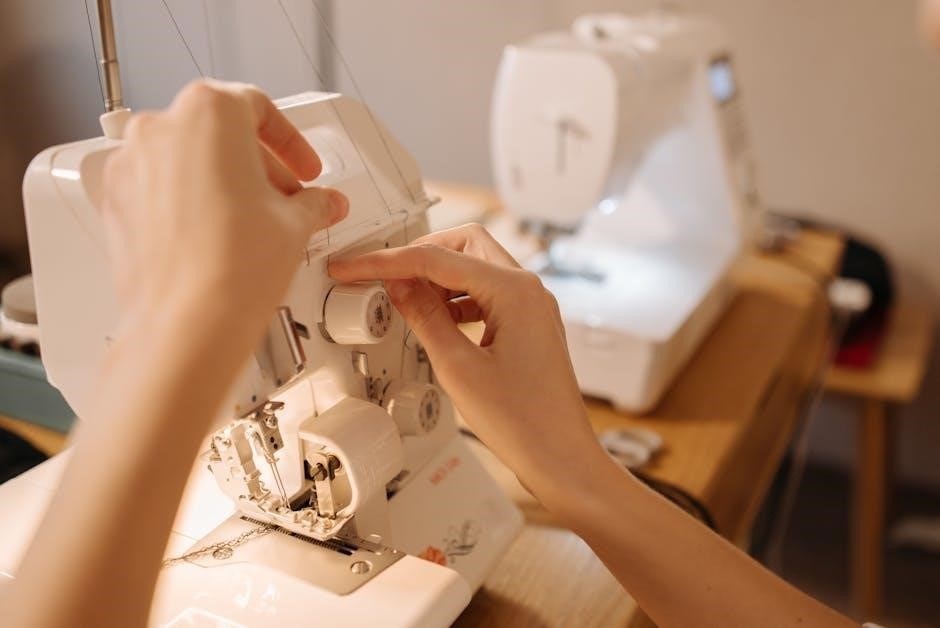
To thread the Lil Sew and Sew machine, start by turning off the power and ensuring the needle is in its highest position. Locate the spool pin and guide the thread through the first thread guide. Next, pass the thread through the tension discs and then through the take-up lever. Continue by threading the needle from front to back. Gently pull the thread to remove any slack. Finally, trim the excess thread close to the needle. Always refer to the marked guides on the machine for precise alignment, ensuring smooth operation and preventing tangles. Proper threading is essential for consistent stitching and optimal performance.
2.2 Bobbin Winding and Installation Process
To wind the bobbin, first, place it on the bobbin winder pin and draw the thread from the spool. Hold the thread gently but firmly, then press the foot pedal to start winding. Stop when the bobbin is about 80% full. Trim the thread close to the bobbin. Next, insert the bobbin into the bobbin case, ensuring it sits snugly. Pull the thread through the slot to secure it. Then, attach the bobbin case to the machine’s hook. Gently pull the thread to ensure it is not tangled. Proper bobbin installation is crucial for smooth stitching and prevents thread issues during sewing.
Stitch Selection and Operation
The Lil Sew and Sew machine features a stitch selector dial, allowing users to choose from various stitch types. Proper stitch selection enhances project results, ensuring optimal performance for different fabrics and tasks.
3.1 Understanding the Stitch Selector Dial and Its Functions
The stitch selector dial on the Lil Sew and Sew machine is a key feature that allows users to choose from various stitch types. Each stitch is designed for specific tasks, such as straight stitching for basic seams or zigzag stitching for stretchy fabrics. The dial simplifies the process of selecting the right stitch, ensuring optimal results for different materials and projects. Proper use of the stitch selector dial enhances the machine’s versatility, making it suitable for both beginners and experienced sewists. Understanding its functions is essential for achieving professional-looking results and maximizing the machine’s capabilities.
3.2 Tips for Selecting the Right Stitch for Specific Projects
Selecting the right stitch is crucial for achieving desired results in your sewing projects. The Lil Sew and Sew machine offers various stitch options, each suited for specific fabrics and tasks. For instance, straight stitches are ideal for lightweight fabrics and straight seams, while zigzag stitches work best for stretchy materials. Always refer to the stitch selection guide in the manual to match the stitch type with your project needs. Testing the stitch on scrap fabric before sewing ensures proper tension and alignment. This step helps prevent errors and enhances the overall quality of your work, making your sewing experience more efficient and enjoyable. Proper stitch selection is key to professional-looking results.
- Use straight stitches for lightweight fabrics and straight seams.
- Opt for zigzag stitches when working with stretchy materials.
- Consult the stitch selection guide in the manual for specific projects.
- Test stitches on scrap fabric before starting your project.
Troubleshooting Common Issues
The manual helps identify and resolve common problems like thread tension issues or mechanical malfunctions, ensuring smooth operation and minimal downtime for your sewing projects.
4.1 Resolving Thread Tension Problems
Thread tension issues are common but easily fixable. The manual guides users to check the upper thread tension dial and ensure it’s set appropriately for the fabric type; If the thread is too tight, it may cause fabric puckering or thread breakage, while loose tension can lead to uneven stitches. To resolve this, turn the handwheel to position the needle correctly, then adjust the tension dial gradually. Ensure the bobbin is properly installed and the thread is evenly wound. Avoid over-tightening, as this can damage the machine. Regularly cleaning the tension discs and using the recommended thread type can prevent such issues. Always refer to the manual for specific adjustments to maintain optimal sewing performance.
4.2 Addressing Common Mechanical Issues
Common mechanical issues with the Lil Sew and Sew machine often involve the handwheel, presser foot, or jammed parts. If the machine won’t turn on, ensure the power switch is functioning and the cord is securely plugged in. For jammed fabric or thread, turn off the machine, remove the needle, and gently clear the blockage. Lubricate moving parts periodically to prevent friction. If the handwheel is stiff, consult the manual for proper lubrication methods. Always unplug the machine before performing maintenance. Regular cleaning and inspection can prevent many mechanical problems. If issues persist, refer to the manual or contact customer support for professional assistance to avoid further damage.
Maintenance and Care of the Lil Sew and Sew Machine
Regular cleaning and lubrication are essential for optimal performance. Use a soft brush to remove dust and debris. Apply a few drops of sewing machine oil to moving parts. Always unplug the machine before performing maintenance. Refer to the manual for specific care instructions to ensure longevity and smooth operation. Monthly checks and proper storage will keep your machine in excellent condition for years of reliable use.
5.1 Cleaning and Lubricating the Machine

Cleaning and lubricating the Lil Sew and Sew machine are vital for maintaining its performance and longevity. Start by turning off and unplugging the machine. Use a soft-bristled brush to gently remove dust, lint, and debris from the exterior and internal components, such as the bobbin area and feed dogs. Next, apply a few drops of high-quality sewing machine oil to moving parts, including the shuttle hook and presser foot mechanisms. Avoid over-lubrication, as it can attract dust. Regular cleaning and lubrication ensure smooth operation and prevent mechanical issues. Always refer to the manual for specific guidance on caring for your machine.
5.2 Regular Checks to Ensure Optimal Performance
Regular checks are essential to maintain the Lil Sew and Sew machine’s optimal performance. Start by inspecting the machine for accumulated lint or dust, especially in the bobbin area and feed dogs. Ensure the needle is sharp and not bent, as a damaged needle can cause uneven stitches. Check the presser foot alignment to ensure proper fabric feeding. Verify that the machine is well-lubricated but not over-oiled, as excess oil can attract dust. Finally, test a scrap fabric to ensure consistent stitch quality. Regular maintenance prevents unexpected issues and extends the machine’s lifespan. Always refer to the manual for specific maintenance intervals and procedures.
User Feedback and Reviews
Users praise the Lil Sew and Sew machine for its portability and ease of use, making it ideal for small projects and beginners. However, some note occasional thread tension issues and unclear manual instructions, which can lead to mechanical problems if not addressed properly.
6.1 Positive Aspects of the Lil Sew and Sew Machine
The Lil Sew and Sew machine is widely praised for its portability, user-friendly design, and versatility in handling small to medium-sized sewing projects. Its compact size makes it ideal for beginners and crafters with limited workspace. Users appreciate the clear and concise instructions provided in the manual, which simplifies the setup and operation process. The machine’s lightweight construction and ease of use have made it a favorite among hobbyists and DIY enthusiasts. Additionally, the inclusion of essential features like multiple stitch functions and a free-arm option enhances its functionality, catering to a variety of creative needs and projects.
6.2 Areas for Improvement Based on User Experiences
While the Lil Sew and Sew machine is popular among users, some areas have been identified for improvement. Many users have noted inconsistencies in the machine’s performance, particularly with thread tension and stitch consistency. The manual, while helpful, lacks detailed troubleshooting sections for common issues like jamming or uneven stitching. Additionally, some users find the machine’s speed insufficient for thicker fabrics, and the limited accessories included can be a drawback. Addressing these concerns could enhance the overall user experience and make the machine more versatile for a wider range of projects and materials.